Tips for Hosting an Easy Dinner Party

It is no secret that I love to cook. Feeding people is my love language and my house will always be open to transform empty bellies into full and happy ones. I hosted a dinner party the other night and when I shared a few snippets of it on Instagram, a few of you reached out and asked me to share my tips on how to make hosting a dinner party easier. I am proud to say that it was amazing and I was able to create a dinner party magic in less than 2 hours. You read that right. I started cooking/setting up around 4:45 and my guests walked through the front door at 6:30. So how did I do it? I will show you how.

Planning:

In order to whip something like this up so quickly, you have to plan. I did a few major things that made this night super easy for me:

  1. I planned my menu out at least a week in advance and checked with all of my guests that they were fans of foods that not everyone loves, i.e., mushrooms in this case. I chose dishes that were not super detailed and needy, so that I could be cooking multiple things at once (I’ll get more into this in a little bit).

  2. I grocery shopped the night before and left everything out on my counter that wasn’t perishable, and put everything together in the fridge that I’d need. This allows you to pull everything out and not go searching through your cupboards/fridge trying to find each ingredient. You’d be surprised how much time you can save when you don’t have to keep walking to the pantry.

  3. I made a rough timeline of what I wanted to cook when. For example, my appetizer was something that needed to sit and stew a little, so I started this first. This allowed me to not have to think about what I needed to do next because it was all written down for me. I just check things off my list.

Decor:

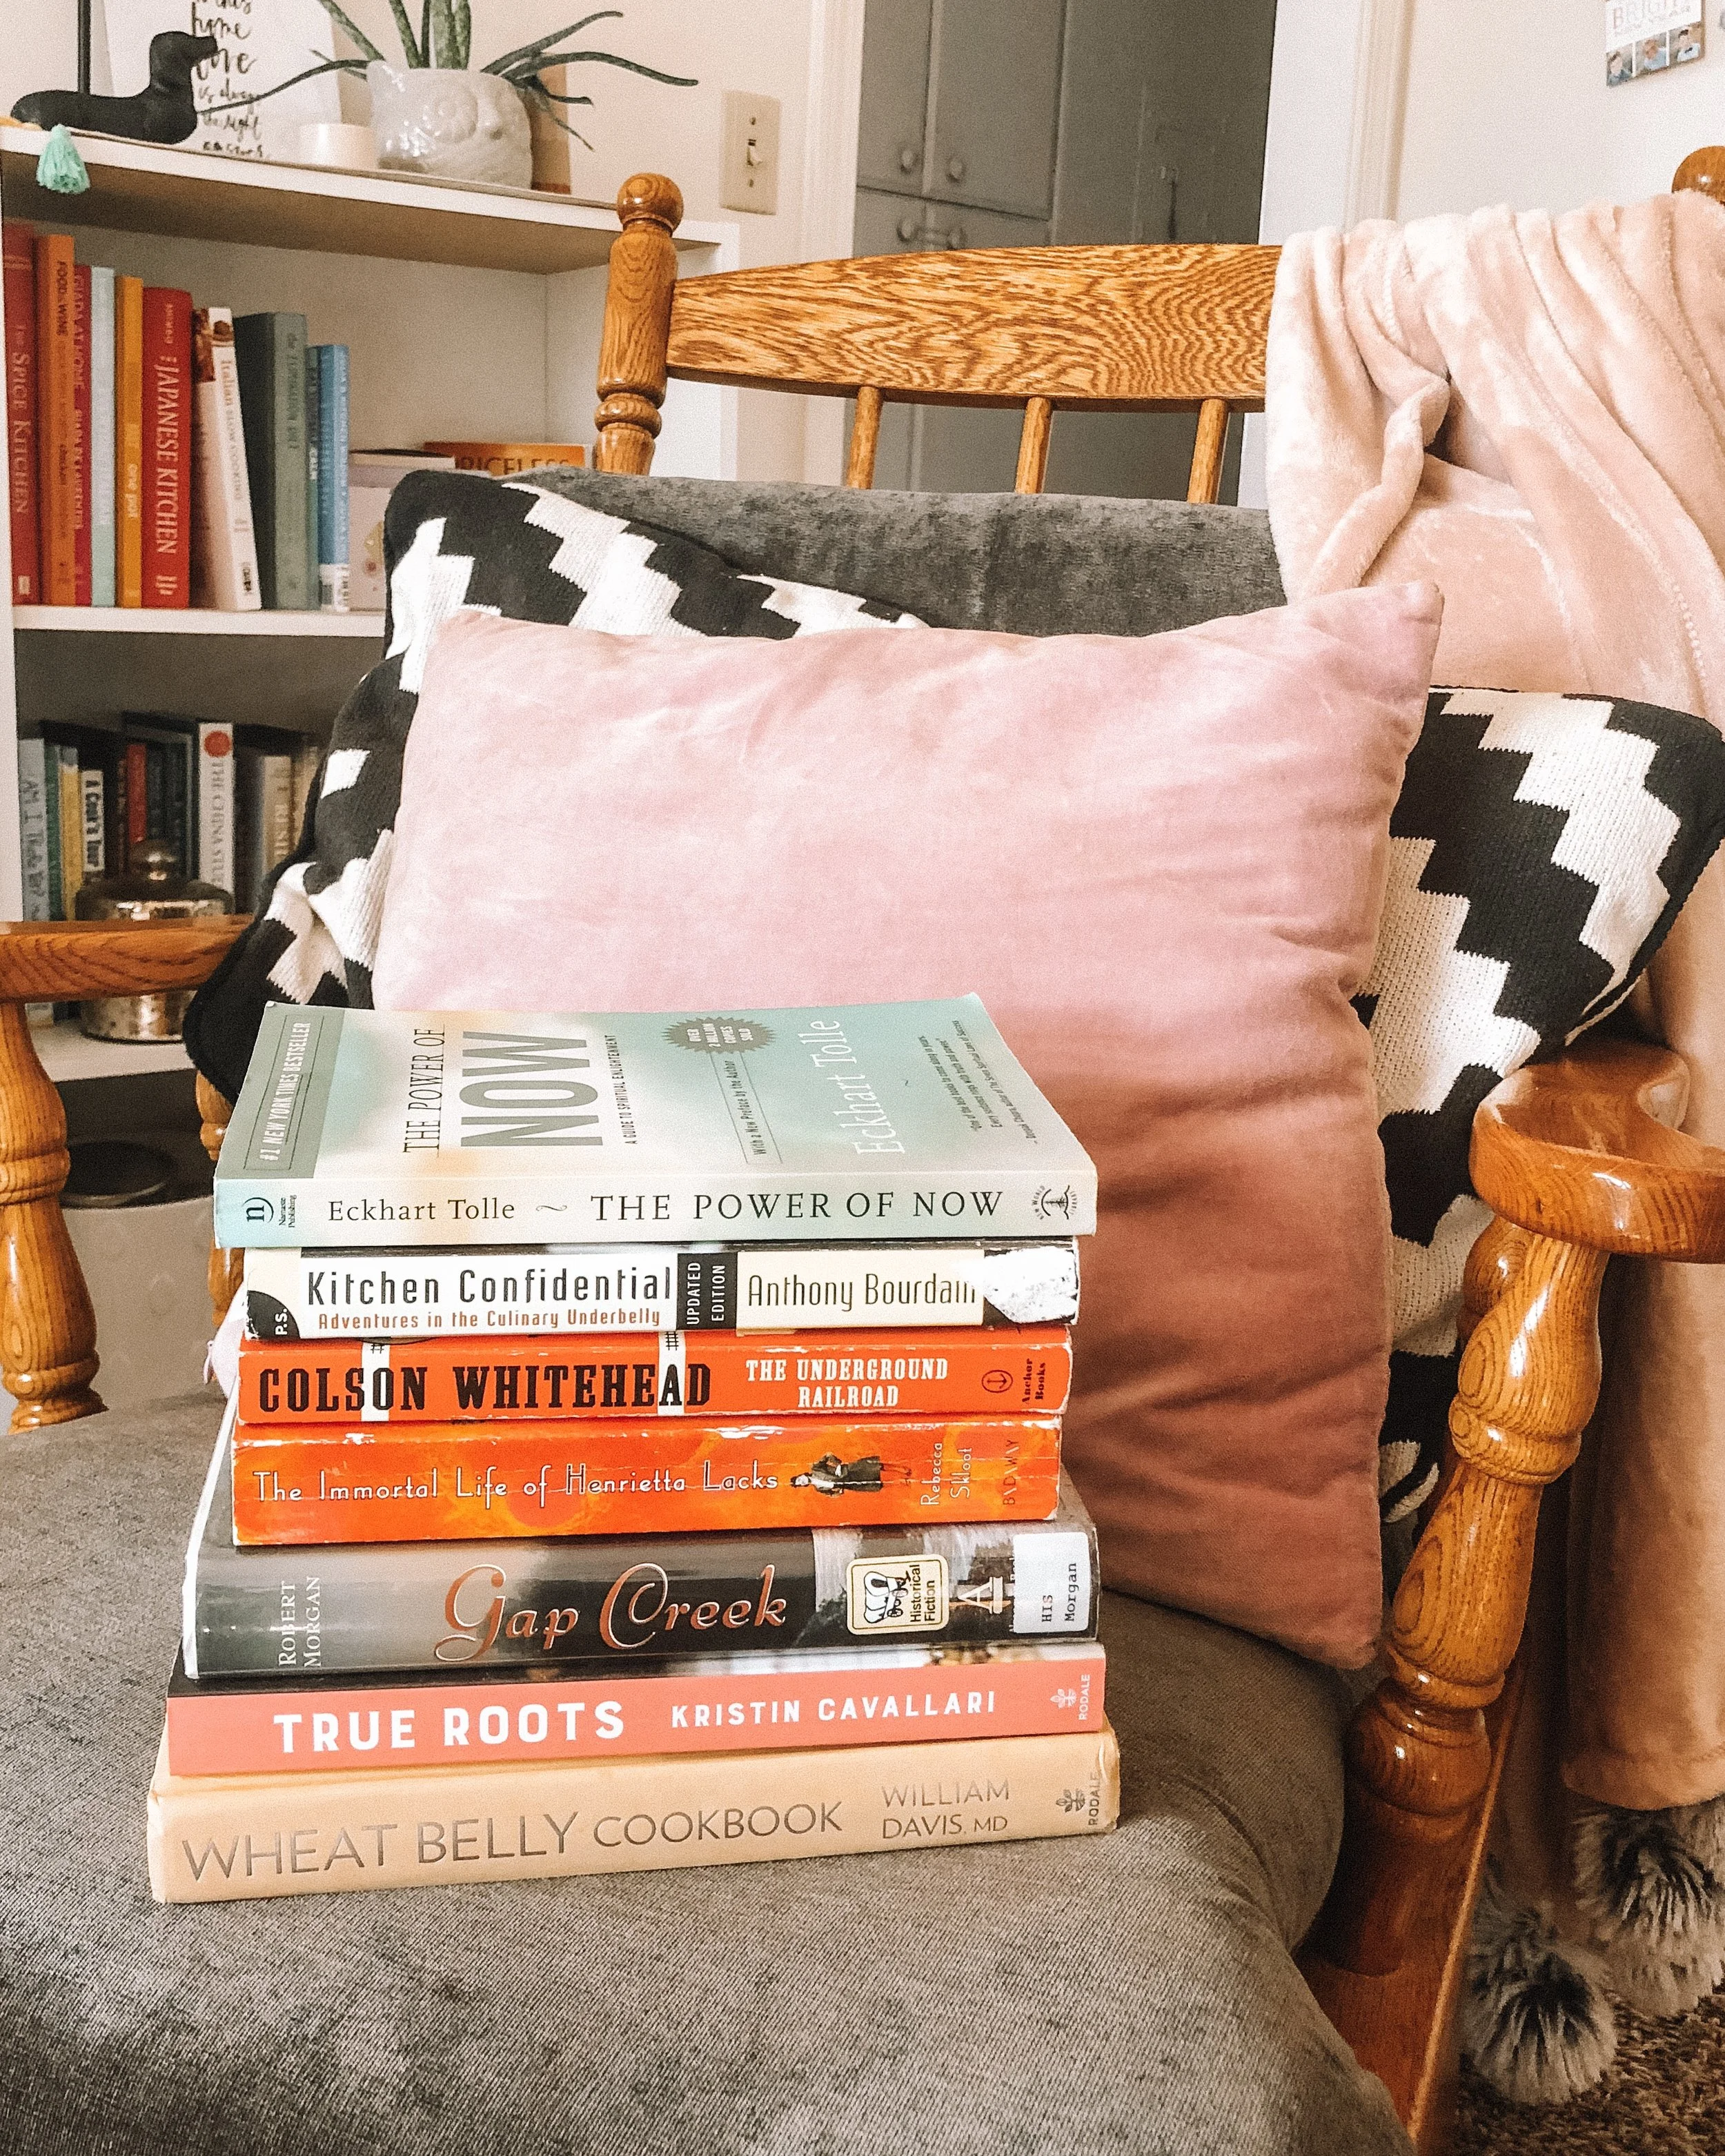
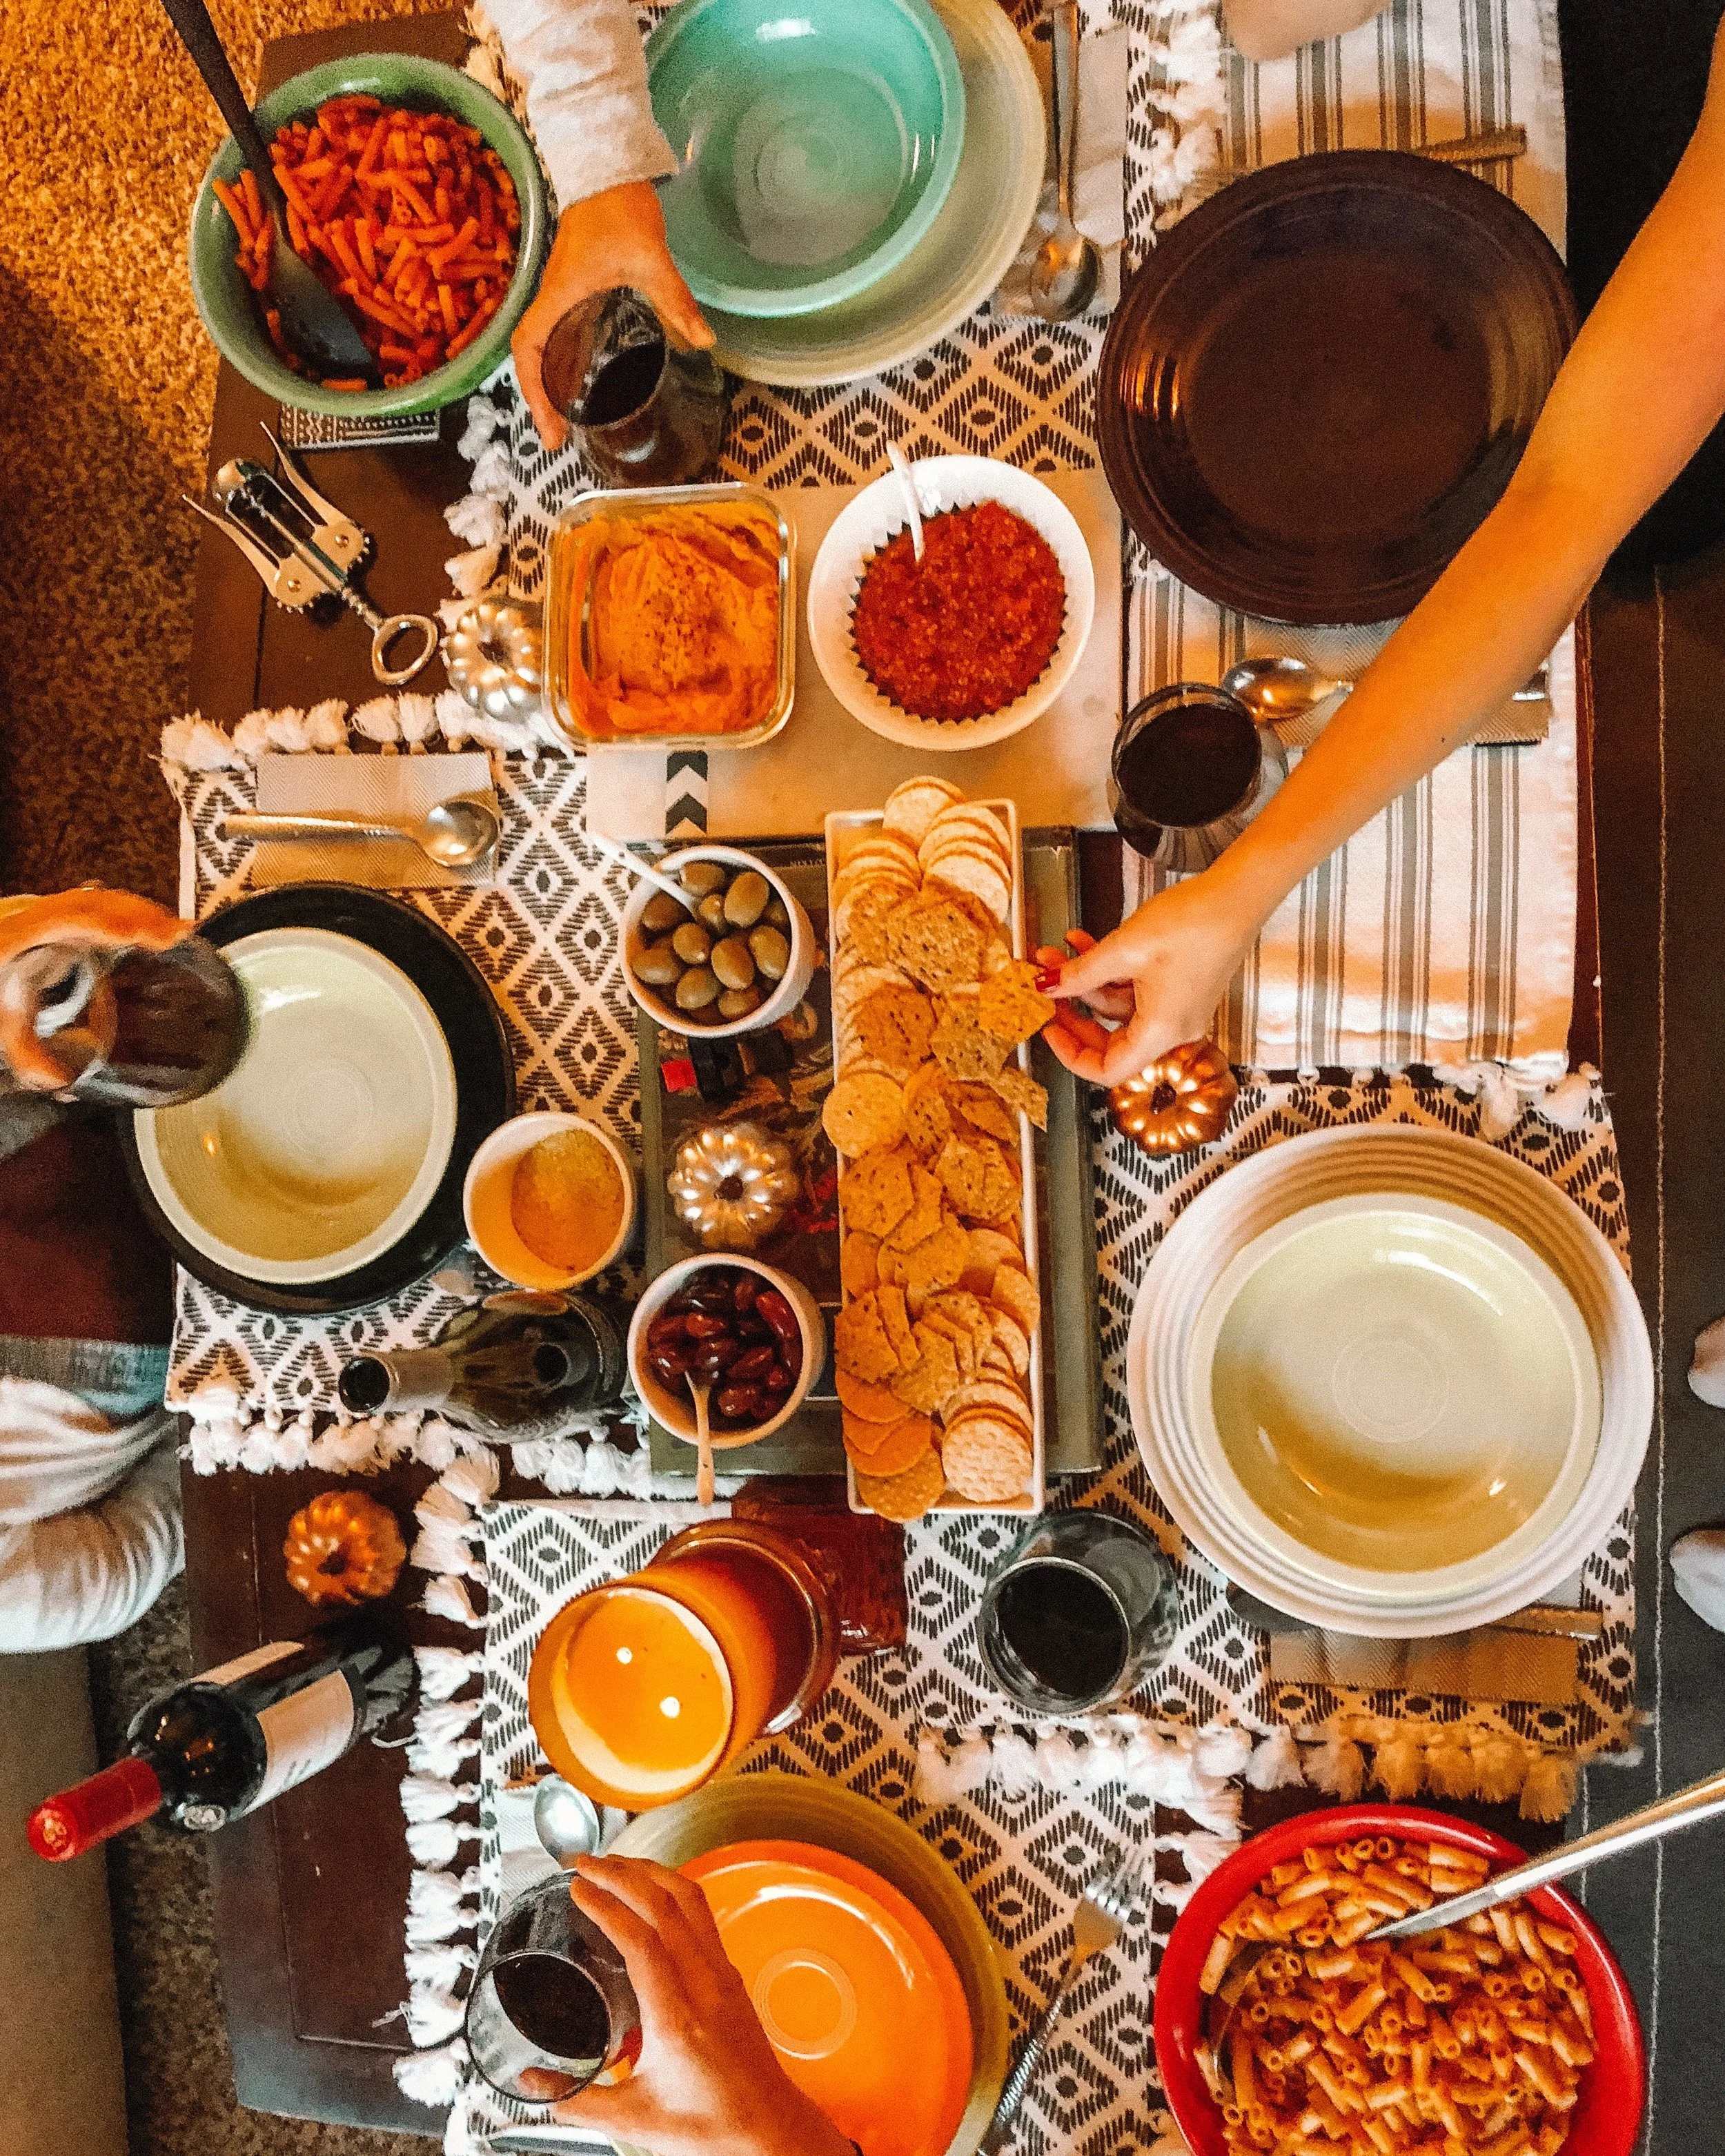
When it comes to decor, I love to have things like books, place mats, candles and such all around. Instead of getting extra decor out to decorate my table, I just used what was already sitting out around me. I walked around my living room and grabbed things like pumpkins and candle sticks, and brought them to my table. I have a little storage cupboard by my front door, who’s top houses my keys and such, but inside I actually hide away all of my entertaining dishes, so that when it’s time to bring them out, they are all in one spot.

Personally, I find a rustic and cozy atmosphere to be the most appealing at a dinner party, so don’t get to stressed about things matching. In case you didn’t notice in the pictures above, I only had four of the gray and white tassel place mats, so I just grabbed a gray and white striped tea towel from my kitchen and added it for my 5th place setting. I’m not big on patterns matching perfectly but I generally always buy my entertaining dishes in neutral colors so that they always go together well enough.

Also, don’t be afraid to get out of the box and get creative with items that might not normally be used on the table. I like playing with height, so I stacked some big and really old coffee table books about Italian food right in the center of the table and placed my bowls for olives on them.

Cooking:

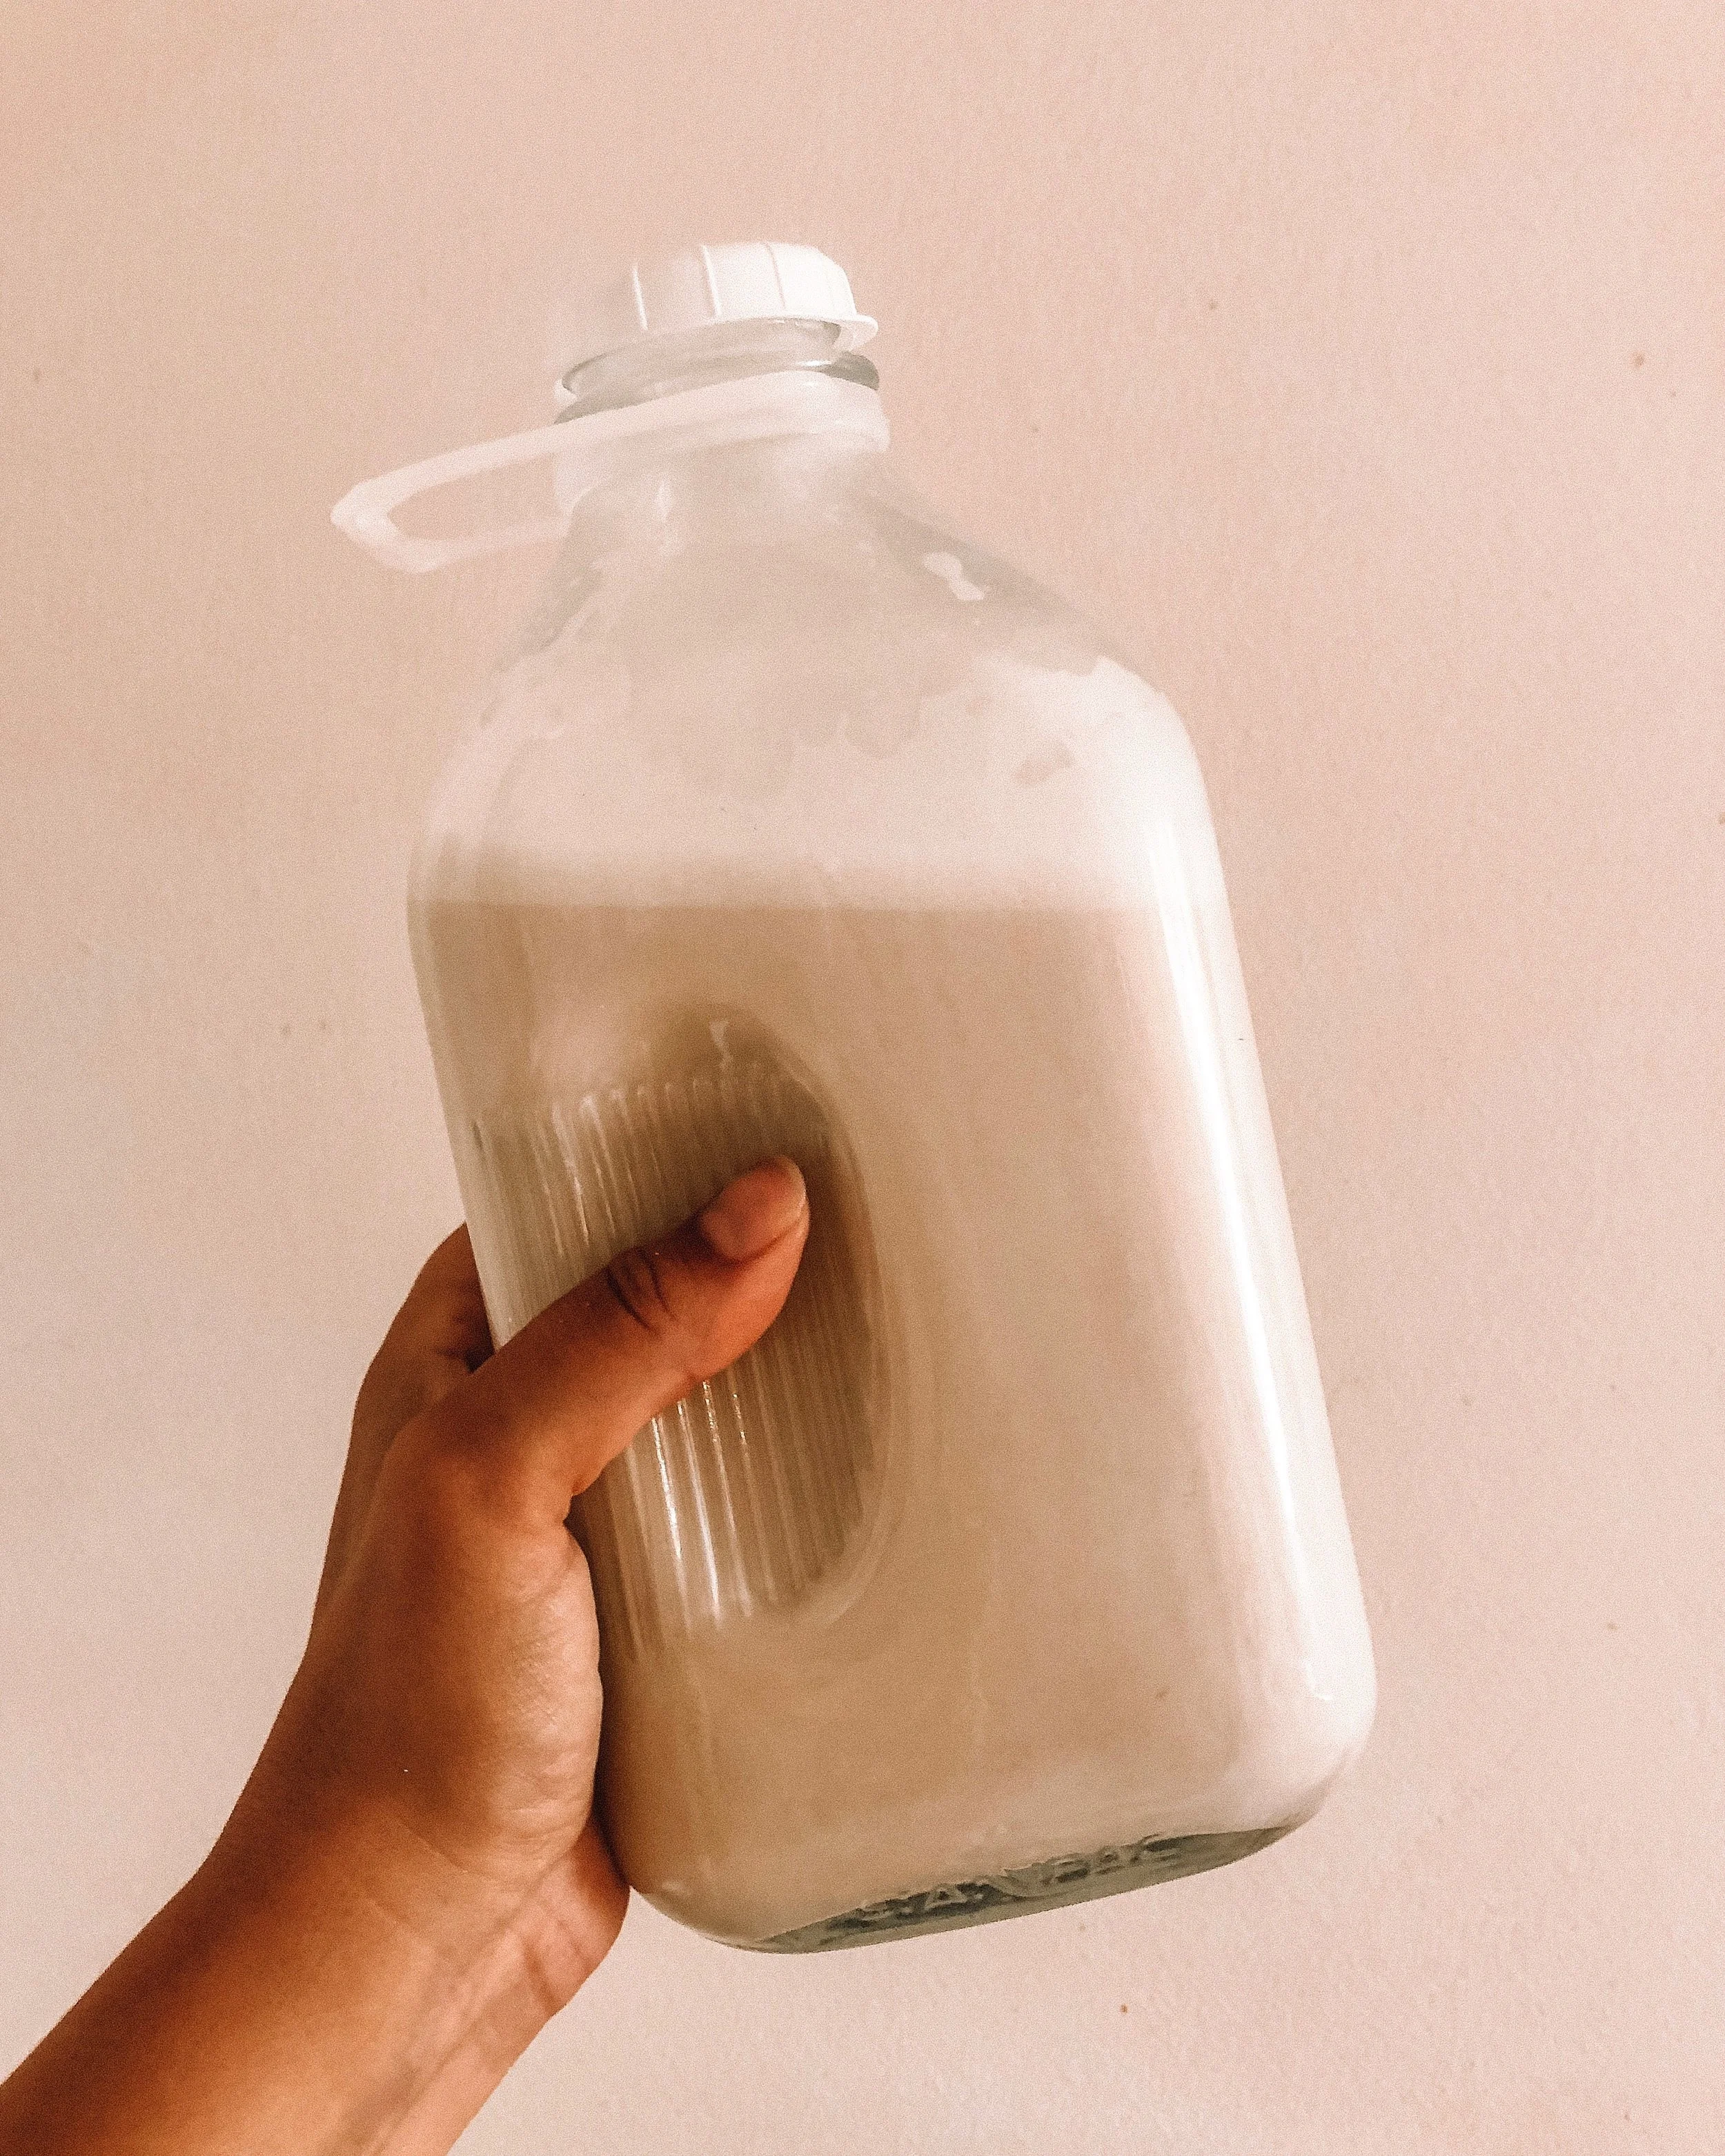
Now for the main portion of the planning and why this dinner party was so easy, did I mention everything was Gluten and Dairy Free? Here are the things I did to make my life easy:

  1. I chose recipes that didn’t need to be babysat, but would still wow my guests.

  2. I baked my pumpkin spice cake the morning of the dinner party at 6:30 am and did yoga while it was in the oven. BAM Kill two birds with one stone people. Also, you will automatically fill your house with the aroma of dessert all day which is a great way to start off prepping for a dinner party!

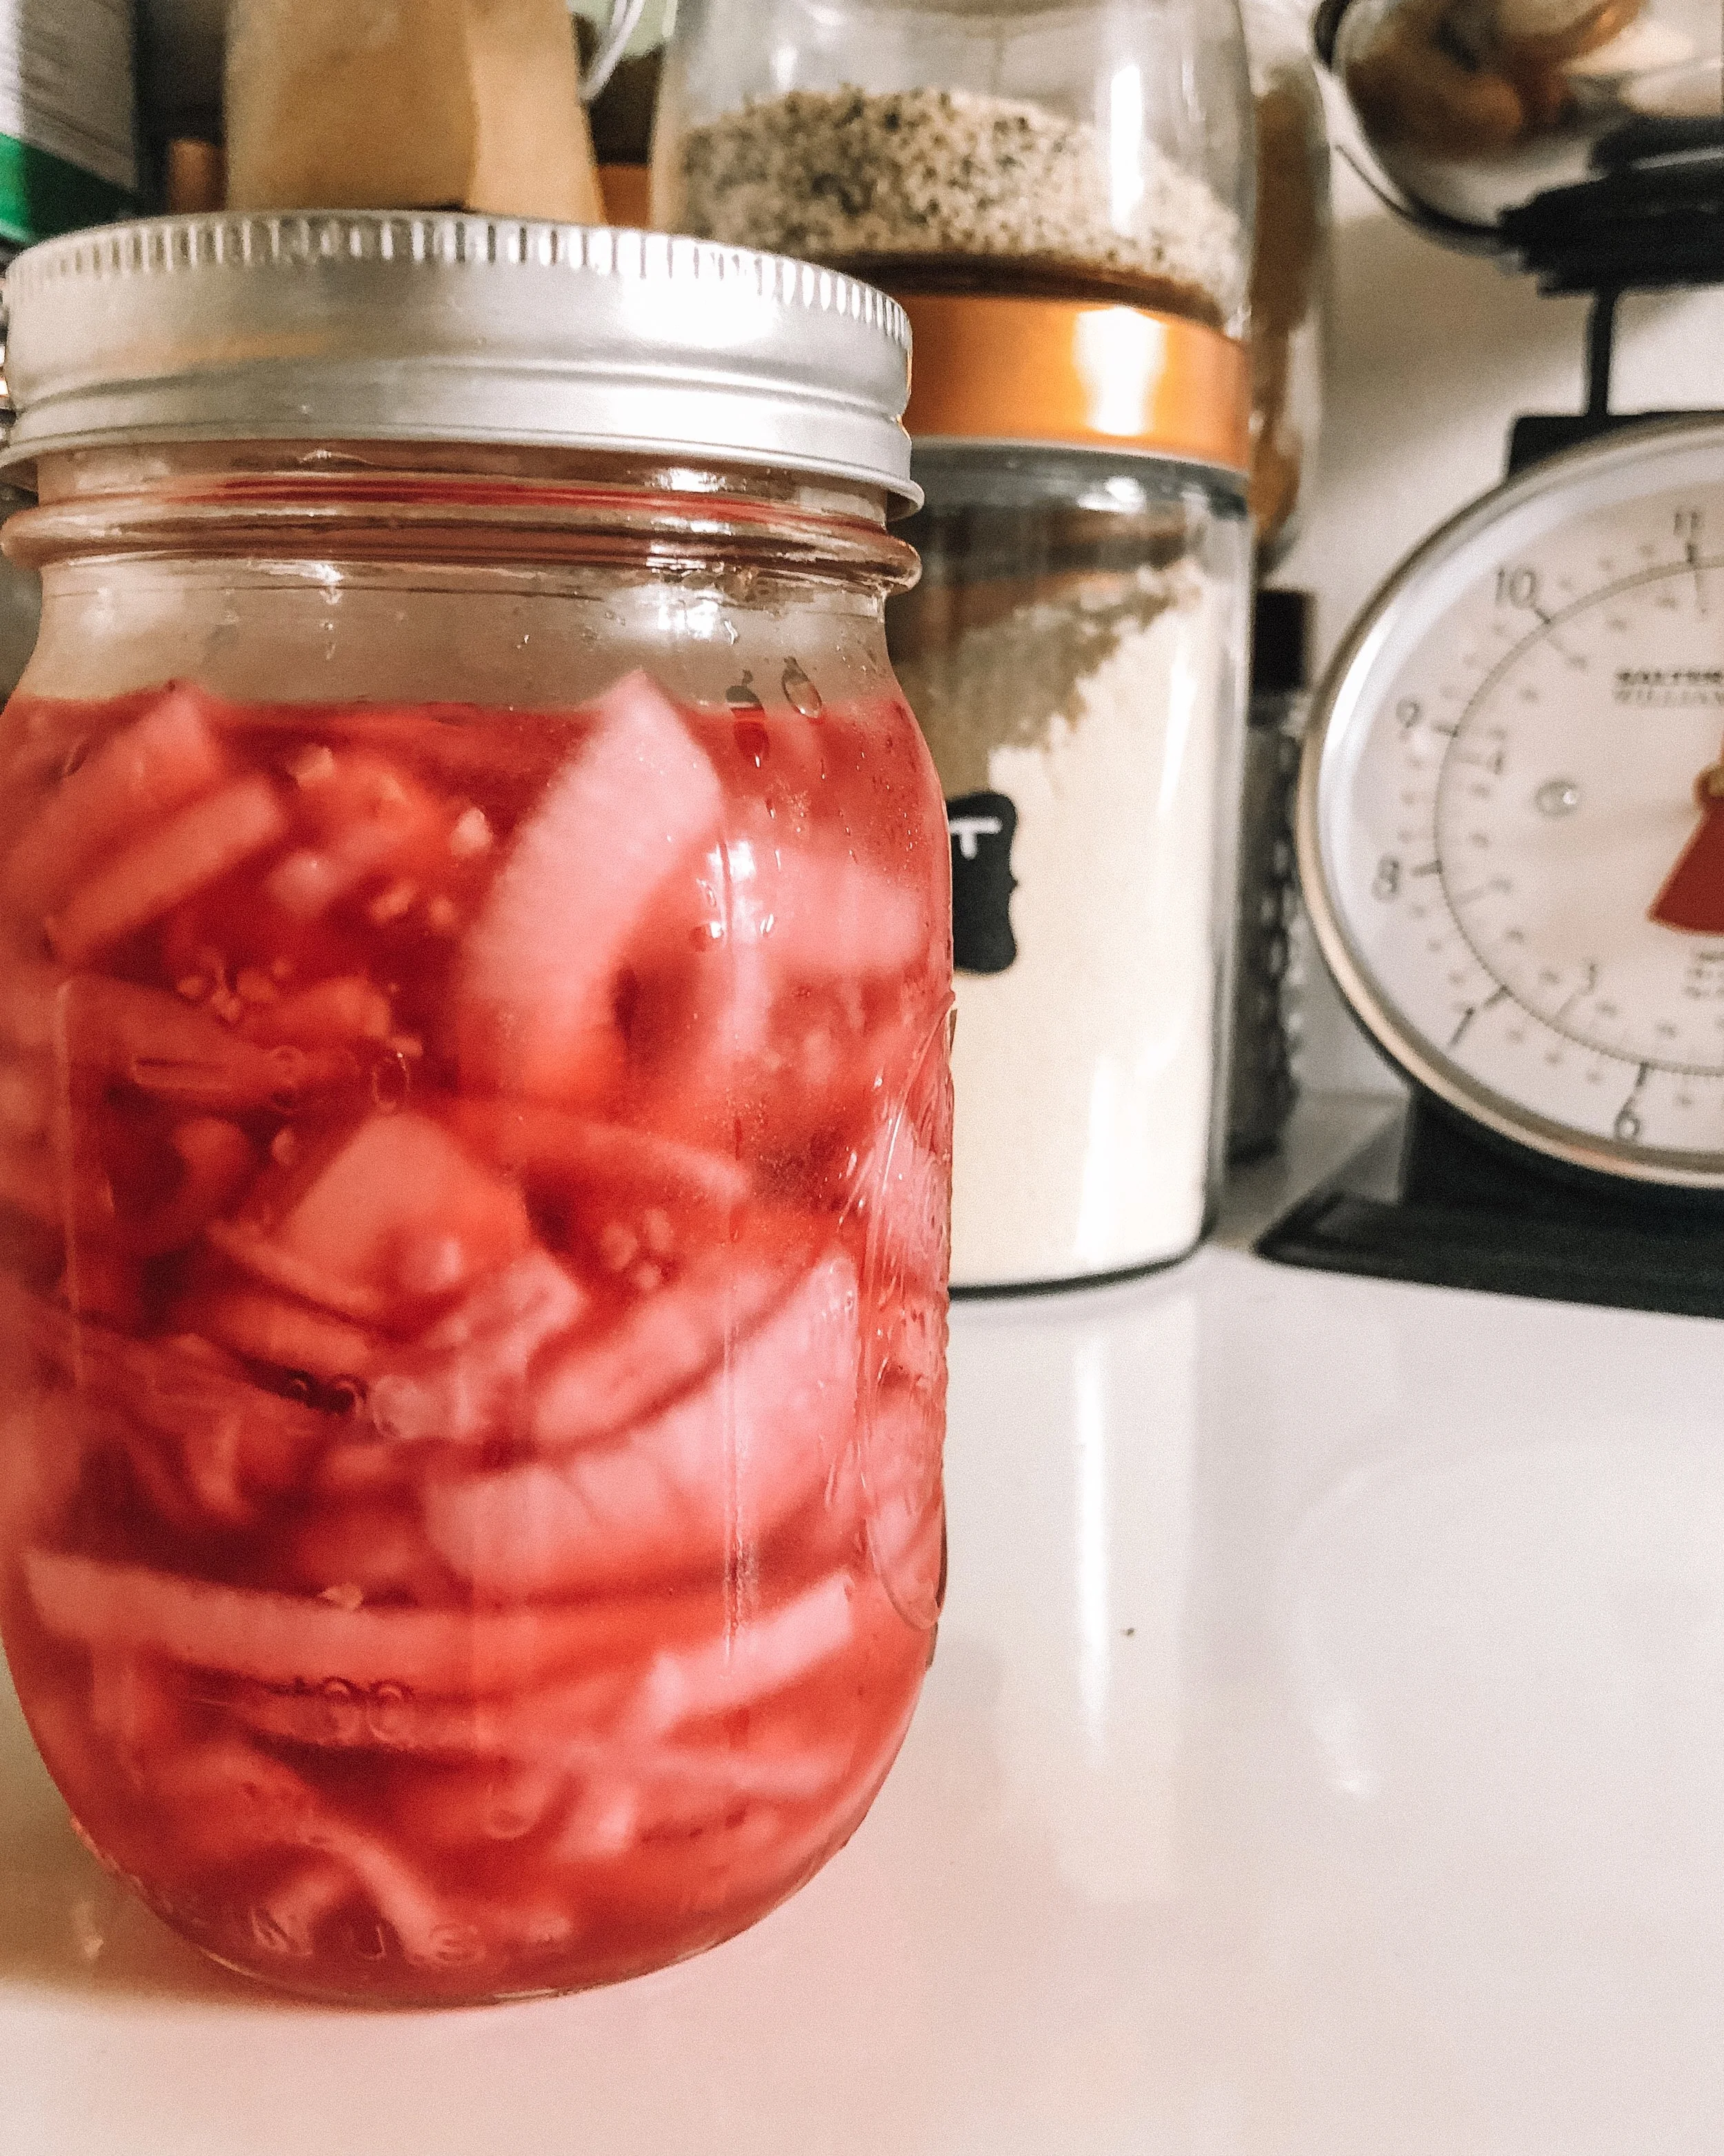
  3. My appetizer was a slow cooked tomato and garlic spread for crackers (recipe to come in a special announcement). I also set out two kinds of olives and would normally do cheese as well if the crowd wasn’t dairy-free.

  4. I also made a super easy and light mushroom soup because once the onions and mushrooms are sauteed and seasoned, it literally sits on the corner burner and stews for a little while, which means you can do other stuff! (Recipe also coming in that super exciting announcement…haha)!

  5. My entree was a homemade vodka sauce (I swear by this recipe from Rachael Ray) over brown rice and red lentil pastas. Can you guess why I picked it? You’re right, it’s super quick and easy and only stews on the stove for like 20 minutes! But you’re actually making a homemade sauce so it tastes like heaven.

If there is one piece of advice I can give you for hosting a dinner party it’s this….CLEAN YOUR DISHES AS YOU GO! There is nothing worse than having the world’s best dinner party full of laughter and happy tummies and then everyone walks out the door and you have a WHOLE kitchen to clean and you get depressed and want to ignore it and walk straight to your bedroom to sleep instead. So I always do this… While I’m cooking I wash every dish I can at every chance I get. I’ll even start placing food in their serving plates so that I can wash the pots they were cooked in. I even go as far as to wipe up my counters and stove before anyone arrives. This way the only things left to clean afterwards are the dishes you eat on and the serving plates. You can quickly rinse all the food off so they are mostly clean, load them in the dishwasher or leave them in the sink for the next morning and get to sleep instead.

I love dinner parties because of how relaxed and enjoyable they are. If you plan ahead and do certain tricks, you can make it enjoyable to host as well. If you have any tips or recipes you love for hosting dinner parties, be sure to comment below! I hope you enjoyed this post and remember; the details aren’t necessarily the most important part of the dinner. The food is a vehicle and excuse to experience the laughs, the stories, and the love among your amazing guests.

Happy hosting!

Andrea

How to Touch Your Face

I know the title of this post might seem strange but hear me out. Think about how many times in your life you will remove makeup or do your skincare routine...A LOT right? We read post after post about different products people recommend but have you really ever learned how to use your hands differently depending on what step you're on? If you have, great! I'm proud! ...But if you don't, this post is for you. I'll be sharing my tips on how to correctly touch your face. 

When removing makeup:

This depends on how you remove your makeup. My main concern is with your eyes. When removing eye makeup, always use your ring and middle fingers to follow the shape of your eyelashes and move down and outward away from your tear ducts. Don't EVER move in circular motions rubbing your eyes. You can get product in your eyes that causes unnecessary irritation. If you need to clean up under the lower lash line, always use your ring fingers, as they are the weakest of your fingers and will do the least amount of damage. Instead of rubbing harder, find a good makeup remover that will dissolve makeup easily so you don't have to apply as much pressure to your face. 

When cleansing:

Cleansing is a really important step that you do often so it's important to understand how to do it correctly. You always want to make sure that you are massaging your cleanser in with your ring and middle fingers. You will have plenty of control, but you won't apply as much pressure as you would with your index fingers. Another key part is that you are massaging in small circles in an upward and outward motion. Imagine you were to draw a line down the front of your face. Move in circles, away from this line in an outward and upward direction. When you are cleansing your face, you should not be scrubbing your eyes either. Depending on your cleanser (i.e. if it has AHA's, BHA's, etc) it might not belong anywhere near your eyes. So be sure to remove your eye makeup and rinse your eye area before hand.  

When applying toners:

Toning is a vital step in skincare routines and can be done in a few different ways, and ultimately depends on what step you're on and what type of toner you are using. If you are hydrating your skin with a rose toner for example, I recommend spray toning. Cover your eyes and mist the toner all over your face a couple times. If your toner cannot be sprayed, apply a little to a cotton pad and gently swipe it from the center of your face in a…you guessed it…upward and outward motion! Make sure not to press too firmly or tug at your skin.

When applying serums & moisturizers:

Depending on the product, the texture can vary, but you should use the same method of application unless specified by the product. Put a few drops or one pump in the upper 2/3 of your fingers of one hand. Using your other hand, gently swirl the product around and using your fingers, press into the your facial skin. Do not pull on or rub the skin, but continue the pressing motion all over the face.

Remember:

Don’t forget that drying off your face when cleansing is equally important. Make sure you are always using a separate towel, different from the hand towel for drying your hands. Bacteria can harbor in hand towels so it’s important to keep the face and hand towels separate. Of course make sure you change them at 1-2 times a week, or more if you are dealing with acne.

Let me know if you found this topic helpful! If you have any tips on how to touch your face when applying products and doing your skincare routine.

Have a beautiful day,

Andrea

How I Whiten My Teeth At Home

Today I’m back with a post that I’m really excited to be sharing. There’s even something exciting for my readers at the end so make sure to read through! 

As many of you know, I quit drinking coffee on a regular basis a few months ago. I have always loved my smile, but in the last few years I had noticed how my coffee habit was affecting the color of my teeth. I figured that since I’ve kicked the caffeine habit, now was the time to look into whitening my smile, as it would be easier to maintain without the daily coffee consumption.  

It’s funny how life works, but after spending a little time researching at home teeth whitening, I opened my email inbox to a message from Smile Brilliant wanting to do a collaboration! If that wasn’t a sign, I don’t know what is. 

I was excited to work with Smile Brilliant because they wanted to send me a teeth whitening system and share my honest feelings with you guys about the process. Now this is not a sponsored post but I did receive the teeth whitening system for free. However, my opinions on it are completely my own and I hope you already know that I would never recommend a product I didn’t like! 

image2.jpeg

I know that a lot of you reading this are getting ready to celebrate either your own special events, like your wedding, or have many close friends and family members celebrating special events and you want to look your best for them all. If your schedule looks anything like mine these days, there are photo ops every month.  

I was excited to try out Smile Brilliant because it’s a professional whitening system that you do at home, yet is still really customized and effective. Not only that, it’s REALLY easy to use. No awkward lights to put in your mouth; just custom trays that fit perfectly and you can go about your activities while whitening. I had only ever used Crest Whitestrips in the past, which were easy but took a lot longer to see results; plus I always experienced sensitivity. Smile Brilliant has a few different system options, and I chose sensitive which has really helped me not feel any side effects in my day to day life while whitening. One thing that is really great about Smile Brilliant is that if you are not happy with your results they will give you a full refund! Click here to visit their website and get even MORE info on the whitening systems! 

When you get your kit in the mail, the first step is to make your impressions so that your trays fit perfectly. The kit comes with very detailed instructions for the whole process. Once you make your impressions, you pop them in a pre-paid envelope and send them back to Smile Brilliant so they can make your trays. This whole process was pretty quick too, which I liked because I was excited to get started! 


image1.jpeg

Once you start the whitening process, it’s simple. 

  1. Brush your teeth with water. 

  2. Fill your trays with the whitening gel and leave in your mouth for 45 minutes up to 3 hours.  

  3. Brush your teeth like normal (including brushing out your trays). 

  4. If you’re doing the sensitive version, you add the desensitizing gel to the trays, leave on for 15-20 minutes and then don’t drink any liquids for at least an hour. 

image1 - Copy.jpeg

It takes anywhere from 7-14 sessions to get your teeth where you want them, and they send plenty of product! Now I’m sure you’re really curious about my thoughts. Below are some photos of my before and after and then we’ll get into the pros and cons of using Smile Brilliant. 

Let’s talk about the cons first. The thing I found most challenging about using the whitening trays was that I had to plan out my life accordingly. I preferred to whiten at night after dinner, but then I couldn’t drink water before bed which was kind of annoying. Sometimes I simply get home too later and need to sleep and don’t have time to whiten so I would have to skip a day or two before I could get back on schedule.  

The only other big con was that I did notice some sensitivity with my gums. Now most of this is probably due to the fact that my labial frenum (google it) on the top of my mouth was supposed to be clipped when I was younger and they never ended up doing it. So this means that it is attached lower than it is supposed to be and the trays really felt too tall for my mouth and scratched up against this. Again, this is more so my fault, not Smile Brilliant’s, but I have to say that I received lots of tips and help from Sierra over at Smile Brilliant, with how to increase my comfort level. I ended up coating my gums in coconut oil before hand and trying not to talk or move my mouth much while whitening. I also decided to whiten every other day, which helped cut back on irritation and I don’t think it skewed my results. If you end up trying this system out, I highly recommend the coconut oil on your gums for decreasing sensitivity! Works great! 

Now let’s talk about the PROS! I cannot believe how quickly this system worked. I noticed my teeth being whiter after one use, but ended up doing 10 sessions. Plus I still have whitening gel that I’m going to keep for touch ups before my sister’s wedding this fall! I loved that the trays were customized and molded to my teeth because having a tray in your mouth for over an hour that is big and doesn’t fit would be super annoying. One big thing I loved too was that even if I accidently got some gel in my mouth, it didn’t taste TERRIBLE. I had a bad experience once....can you tell? Haha  

I’m really excited to enter the fall season of weddings and events that I have being more confident in my smile. I think we can all agree that a whiter smile makes us feel more confident as we go about our daily business. As a makeup artist I am always taking pictures of my own face to share makeup looks, meeting new clients, and even taking photos with my brides. I am happy now that my smile is free of the coffee stains and would highly recommend you give Smile Brilliant a look if you are looking for teeth whitening.  

Here’s what my teeth looked like before and after 10 uses of the Smile Brilliant Sensitive Whitening System.  

These photos have not been filtered and have had absolutely no retouching. These ARE MY TEETH!

These photos have not been filtered and have had absolutely no retouching. These ARE MY TEETH!

Now for the exciting part! I am doing to be doing a giveaway with Smile Brilliant that will allow one of my amazing readers to win a whitening system of their own! Click the link below to enter the giveaway that is being hosted on their website for all of you! Good luck!! 

CLICK HERE TO ENTER GIVEAWAY! (Giveaway close one week from today - September 3rd

You can also use the code andreafontanabeauty15 to recieve 15% off store wide at Smile Brilliant!

Please be sure to message me or leave me comment below if you have questions about the Smile Brilliant at home whitening system. Also let me know if you try it out for yourself and what you think about it! I’m excited to have been able to share something like this with you guys.  

Have a beautiful weekend, 

Andrea

Books I've Read Recently #2

I feel like I start every post referencing something that I've talked about on Instagram, but guys I really share more details on there so go follow me (@andreafontanabeauty). I often share little cover shots of books I'm currently reading and a lot of you ask for recommendations and want to know what I'm reading so I'm back with another post sharing what I've recently read (including cookbooks) and what I think of them. Click here if you want to see what I was reading earlier this year. I've also decided to rename these posts so that they are easier to find as the years go by. 

IMG_5525.JPG

So let's get into the books! I'm proud to say that I've read all of these in the last 2-3 months and have generally enjoyed each of them.

The Power of Now by Eckhart Tolle: I had purchased this book because it was recommended in the back of 'You are A Badass' (which I read in my last book update). ' This book took me awhile to get through because I had to keep rereading lines in order to fully understand them. It's really great and emphasizes the importance of living in the present. However, I would only recommend it if you know what you are getting into. I found I couldn't read it before bed because I would get too sleepy and wasn't able to give it my full attention. Just know that when you read it you have to read it in a very detailed way and it's not one you can breeze through and still understand the full meaning. I still highly recommend it though! It's a really important topic when finding true happiness within yourself. 

Kitchen Confidential by Anthony Bourdain: I had this one sitting on my shelf but didn't finally pick it up and read it until Anthony Bourdain's tragic death a few months ago. I really respected him before reading it and respect him even more after reading. If you enjoy his shows and haven't read this one yet, pick it up. It's really eye opening and he's a great storyteller. I like that he wasn't as well known when he wrote it. I don't think he expected it to blow up which allowed him to write a little more honestly about the restaurant world. I'm excited to read more of his books and continue to be inspired by the amazing chef that he was. His love for learning about others' cultures is something we can all learn from. 

The Underground Railroad by Colson Whitehead: Mikey bought this one in an airport when we were heading to Florida this year and it somehow ended up on my bookshelf. After seeing it on someone's #CurrentlyReading Instagram post I decided to take it with me on the train to Chicago in July. I ended up reading the first 150 pages during the entire 4 hour train ride to Chicago and was hooked. I love how Whitehead was able to create a story about such a significant time in history that allowed you to escape to that time. His story actually describes the Underground Railroad as a functioning train that runs underground which I found really interesting to read. I highly suggest you pick this one up if you enjoy history, but the creativity of fiction.

The Immortal Life of Henrietta Lacks by Rebecca Skloot: My science background led me to this read and again it's great if you love history. Telling the story of Henrietta Lacks the source of Hela cells that I learned so much about in my time studying for my B.S. in Human Biology. I took a class my senior year that discussed the ethics surrounding similar issues to this one and it was one of my favorite classes I took while at Michigan State University. I think it's important for us to learn about and discuss the boundaries of science and technology. You don't have to be a science whiz to enjoy this one. 

Gap Creek by Robert Morgan: This book tells the story of Julie Richards a young newly-married woman at the end of the 19th century living in the Appalachian Mountains. It follows the first year of Julie's marriage to Hank through meeting and marrying him, loss, heartbreak, being completely broke and starving, motherhood and I really enjoyed it. I found myself wanting to know more about her story, but after completing the book I realized how this book needed to tell just this portion of her life to be successful. I loved how Morgan was able to capture the thought process of a young woman and I think many of you ladies could relate to some of her thoughts as well. His writing made me feel like Julie was reading her story to me herself and I love that in a book. 

True Roots by Kristin Cavallari: It's no secret that I am obsessed with this gluten-free, dairy-free, minimal processed sugar cookbook. I had heard amazing things and finally broke down and bought it. I have made over 15 of the recipes already and can't wait to try more. I highly recommend it if you are gluten or dairy free. Some of my favorite recipes include the brussel sprouts salad, peanut butter brownies, chia pudding, pancakes....the list goes on.

Wheat Belly Cookbook by William Davis M.D.: While this book is marketed for weight loss, I bought it because it had good reviews and I wanted more gluten free cookbooks. I've only made a few of the recipes but I really think it could become a staple in my kitchen. There are lots of basic recipes that I think will be useful to reference in the future while eliminating gluten.

What have you been reading in the last few months? Leave a comment below and let me know what your recommendations are!

Have a great weekend, 

Andrea


Easy Wedding Guest Makeup Look

I haven't done a step by step picture tutorial in a while for you guys and since it's wedding season, I thought I'd bring you one that is so easy! You only need 3 eyeshadows and a black eyeliner pencil and you're good to go. The technique can be done with WHATEVER colored eyeshadow you want. I used a brown one with copper sparkles but you can do a bright color like teal or maybe navy; both of which I think would be stunning. The possibilities are endless, so practice the technique and get to experimenting! I like how it gives a darker, soft and smokey look which is perfect if you have weddings to attend late summer/early fall! I used three shadows from the Anastasia Beverly Hills Artist Palette but you can use whatever you want! You'll just need a matte shade close to your skin tone, your main color, and a shimmering/metallic shade to jazz it up a bit! The brushes I used were simple and few too; one fluffy blending brush and one pencil brush! That's it! Now let's get started...

Before I began, I prepped my eyelid with some leftover concealer. Then I used the skin tone shade (Buttery) and put it all over my lid using the fluffy blending brush. I also added a thin line of black eyeliner.

Before I began, I prepped my eyelid with some leftover concealer. Then I used the skin tone shade (Buttery) and put it all over my lid using the fluffy blending brush. I also added a thin line of black eyeliner.

Next, I applied my main shade (Baby I'm a Star) with the pencil brush all over the eyeliner and blended it out slightly. Then I took my blending brush and blended the line out a little bit. The blending causes the pigment and shimmer to be lost so a…

Next, I applied my main shade (Baby I'm a Star) with the pencil brush all over the eyeliner and blended it out slightly. Then I took my blending brush and blended the line out a little bit. The blending causes the pigment and shimmer to be lost so add a little more shadow.

Keep adding more shadow and blending it out, until you have your desired intensity and smokiness. Lastly, I added the same main color on the outer 2/3 of my lower lash line and blended it out, and popped a little of my metallic shade (Beigely) to th…

Keep adding more shadow and blending it out, until you have your desired intensity and smokiness. Lastly, I added the same main color on the outer 2/3 of my lower lash line and blended it out, and popped a little of my metallic shade (Beigely) to the inner corner. 

FullSizeRender.jpg

Here are the shades that I used from the Anastasia Beverly Hills Artist Palette just for reference (the camera doesn't quite pickup the copper glitter in Baby I'm a Star but that's what makes this color fun). Remember thought! You can use whatever colors you want! I'm just trying to teach you the technique so you can create a perfect simple, but smokey eye makeup look that you can wear to any special nighttime event (or wear it in the daytime! I'm not here to judge)!

And now for the final look! I just finished the look off with one of my favorite mascaras (Loreal Voluminous Lash Paradise) and the eye look was complete! All other makeup details are listed below in the photo's caption!

Makeup Details: Foundation - Makeup Forever HD; Concealer - MAC Cosmetics Pro Longwear; Contour/Bronze - Fenty Beauty Match stix in Amber; Blush - Sephora Collection Colorful Face Powder in 007 Too Hot; Highlight - Milk Makeup Holographic Stick in M…

Makeup Details: Foundation - Makeup Forever HD; Concealer - MAC Cosmetics Pro Longwear; Contour/Bronze - Fenty Beauty Match stix in Amber; Blush - Sephora Collection Colorful Face Powder in 007 Too Hot; Highlight - Milk Makeup Holographic Stick in Mars; Lips - Nothing!, Brows - Nothing!

What do you guys think? Would you wear this look to the next wedding you need to attend? Leave a comment below and let me know what you think! And if you ever recreate it, send me a photo or tag me with #andreafontanabeauty on Instagram so I can see it!

Have a great weekend,

Andrea

My 'Party's Over' Detox Skin Tips

Welcome back! If you don't follow me on Instagram (...but like why aren't you?) then you wouldn't know that I spent 5 days last week in Chicago working a wedding and then frolicking with friends in the city. This meant more gluten than I normally eat, little sleep, wine instead of water, and all sorts of anti-clear skin habits. Am I paying for it? You betcha. Was it worth it? HELL YES! Because spending quality time with my best friends is priceless and I have the tricks to get my skin back to where I want it once the party's over. 

Today I'm sharing what I've been doing to get my skin back to where I want it & my body feeling normal again. These are my "Party's Over" Detox Skin Tips. Whether you're back from vacation or just celebrated your birthday week (...or month haha) I hope you find these tips helpful to getting back on track with your skin & body.

1. Get rid of all the guilt. Do not spend one second stressed about the fact that you had 2 donuts instead of 1. We've all been there. We've all done it. But that's the point. It's done and all you can do is accept that you cannot change it and get back on track now.

2. Cut out your trigger foods for a week. The first thing I had to do when I got back was get back to eating gluten-free every meal. I usually had one or two meals with gluten when I was in Chicago and since it affects my skin so much, I have cut them out for a week to boost my clear skin and feel better. Whatever your trigger food may be, skip it for a few days or a week and it'll help you to start feeling like yourself again.

3. Do an At Home Detox Facial: Chances are you were a little more lax with your skincare routine when on vacation so it's time to get your skin back into shape. This is especially important for me because my diet caused some serious texture issues and breakouts. I cannot recommend this enough. Here's how I do it.

  1. Start by cleansing your face & toning. I'm currently using this Juice Beauty Green Apple Brightening Gel Cleanser, but if you don't have it try to go for one with a gentle chemical exfoliation to help get rid of any congestion. This cleanser was in my July Favorites; click here to read why I liked it. 
  2. 1st Mask: Chemical exfoliation; I like the Herbivore Botanicals Blue Tansy Mask because it's great for blemishes. Leave on for 15-20 min until dry and wash off & tone again.
  3. 2nd Mask: Detox and clarifying; I prefer the Aztec Healing Bentonite Clay because it boosts circulation and detoxifies so well! Click here to read my post on this mask. The clay comes as powder and I like to mix it with apple cider vinegar or water and add a few drops of tea tree oil until it forms a thin paste. I apply it and leave it on for 30-45 min depending on how long it takes to dry/how long I can handle it. It tingles! Rinse and tone again.
  4. 3rd Mask: Hydrate & Nourish; I love the Farmacy Honey Potion Renewing Anti-Oxidant Hydration Mask to hydrate and heal my skin after I've neglected it. It warms on contact and is such a comforting and nourishing experience. Leave this one on for about 15 minutes and have a cup of tea. Rinse off, tone, and apply your normal spot treatments & serums. 
  5. Lastly it's time to re-hydrate your skin due to your preference of wine over water. I like to throw on my Laneige Water Sleeping Mask in place of my moisturizer so I can really benefit from all the hyaluronic acid and feel hydrated when I wake up.

4. Try reducing your caffeine intake. I know what you're probably thinking. Wait, I need MORE coffee to recover from a great time than less, but trust me. Your skin and your body will adapt better with less caffeine. Try sleeping more instead! Crazy I know...

Go ahead bookmark this post for easy access next time you have a girls night out, staycation, or simply need weekend recovery. If you're like me, you're not 21 anymore and can use the tips to getting back on track. Maybe you'll feel a little less stressed about skipping your routine when it's time to simply have fun!

Have a great week,

Andrea

July Favorites

I'm back with favorites and I'm excited to share the ones I have this month. I polled you guys over on Instagram and while a lot of you like the video format from last month, most of you prefer the written format, so I'll probably return to this format and film a YouTube favorites video every so often. 

This month is short but sweet, but I hope you enjoy it.

The only skincare product that is new to me recently is this Green Apple Brightening Gel Cleanser by Juice Beauty.  When I went through my skincare product detoxification, my cleanser rated so high on Think Dirty. This one is a ZERO and I love it. I feel like I've hit the jackpot. It's loaded with antioxidants which is really important in protecting your skin. The brightening is due to the citric (lemon) and malic (apple) acids! I love how this has left my skin feeling cleansed well (coconut oils) and brightened. I highly recommend it if you are someone who struggles with an uneven skin tone.

Every spring/summer I seem to revisit my lipstick collection and pick out lipsticks that I forgot about. This one from Maybelline (Shade 945: "Stormy Sahara" is one I realized that I've never talked about but is a classic shade from them. If you're a light/medium skin tone and looking for a good rosy/nude check this one out. 

This next favorite is also a lip product but on the higher end. Back in the spring when I did a Sephora and Ulta haul I mentioned this NARS Power Matte Lip Pigment in 'Walk This Way'. I am so amazed by the formula of these. They feel like water going on, but are packed with pigment and go on so easily. They dry down to being virtually undetectable and wear so nicely on the lips. I love this shade too, because it's just enough of a pop of color to be noticeable but isn't obnoxious and bright. 

My last beauty favorite is a nail polish that has been the only thing on my toes for the past year. The color looks especially great in the summer. I'm not sure if you can still get it anywhere besides this website I found, but the Essie Metallics Collections in 'Nothing Else Metals" is the best shade. It's a silver/lavender shade that looks so great on toes. It matches everything and really looks great with a tan in the summer. 

A food favorite for the month is one that I tried a long time ago. I can't remember where I tried this brand for the first time, but when I went on Amazon to buy them I ended up getting this variety pack that was AMAZING! These bars are free of the top allergies; peanut, dairy, gluten, tree nut, soy, egg, fish, shellfish, & sesame. While I try to stay away from processed snacks, these are relatively clean and I like them every once in a while especially now that I'm gluten free. The Chocolate Chip crispy squares and Strawberry granola minis were definitely my two favorites, but I really enjoyed all the flavors. 

So those are my favorites from the month of July! I told you they were going to be short and sweet! What have you been loving? Leave a comment below and let me know.

Have a great August,

Andrea

Disclosure: Amazon links are Amazon Affiliate links meaning that I make a commission off the purchase of the product through my link. I would never recommend a product that I didn't love and all opinions are my own. I am thankful for you choosing to purchase through my links, as it helps me create more content for Andrea Fontana Beauty.

How to Pickle Onions

This recipe was highly requested over on my Instagram because it seems I'm always showing or mentioning pickled red onions in my food posts. I'm just obsessed with them. They make many dishes look prettier and taste better! If I don't know what I'm making for dinner at night, you can often find me standing with the fridge open, pickled onion jar in my hand, snacking as I scan the fridge for ingredients and ideas for that night. If you don't follow my Instagram yet, go check it out! It's where I talk about food the most and share tons of tips

IMG_4848.JPG

To make pickled onions you will need the following:

1 large red onion  (I like to use red, but you can use others)
1 cup of white vinegar
minced garlic
black peppercorns
3 TB white sugar
1.5 TB salt
Storage jar like a mason jar

1. First add your vinegar, salt, sugar and peppercorns to a small saucepan and mix to dissolve the sugar and salt. Put the lid on the pan and bring to a boil over just slightly higher than medium heat.

2. While waiting for mixture to boil, slice your onion into really thin rings. I like to put them in a big bowl and mix a few teaspoons of minced garlic into them. 

3. When mixture comes to a boil, pour it evenly over the onion & garlic mixture and mix it well. I like to put the lid from my pan over the onions in the bowl to trap the heat in there so they don't cool as quickly. If your liquid doesn't quite cover all of your onions (this can depend on what size of bowl you use), mix the onions in the liquid mixture every 15ish minutes. 

4. Let the onions cool and place in the mason jar making sure to pour the pickling liquid in with the onions to cover them. You can really squeeze them in there, I promise! Store in the fridge for up to 4 weeks. (Mine never last this long...haha)

5. ENJOY! These are great on tacos, burrito bowls, sushi bowls, scrambled eggs, and more! The possibilities are endless. 

Leave a comment below letting me know what your favorite thing to pickle is!!

Have a great day,

Andrea

Recent Empties #2

I've found that you guys really like these empties posts because it's nice to see products I didn't like as well. It's been awhile since I did my last one, so I wanted to share with you the products I've used up in the last few months. I think this post will be equally as helpful because I have some products I won't be repurchasing because of the ingredients they contain and that I am finding cleaner alternatives. I've divided them up into categories so it's a little more helpful, and I've included products that I use up in my kit since that might be interesting for you as well! Let's get started:

Makeup Empties:

Most of these products were from my kit which will be helpful for you if you're looking for products I trust and love. First up we have two bottles of the Ulta Beauty Brush & Sponge Cleanser. I go through this stuff like water because it's such a great brush cleanser. It's really effective and you don't need much product. It also dries really quickly, so when I'm doing clients back to back, it's easy to sanitize and clean my brushes fast and move onto my next client. If you don't deep clean your brushes as often as you should, I highly recommend getting a spot cleaner like this to wash them frequently (every other day) in between deep cleansing. I will continue to keep repurchasing this spot cleanser until I find one that I like more or is comparable but more cost effective. 

This next product is also from my kit and I have a love/hate relationship with it. MAC Cosmetics Fix + is a cult favorite and I keep it in my kit for only one reason; to wet my brush for metallic shadows/more color payoff. I do not like it as setting spray for the whole face because I hate the way the container sprays. I'm picky when it comes to spraying a face of makeup that I've just put so much work and love into. I also find that the bottle tends to leak when I'm transporting it from job to job, so after 2 or 3 bottles completely emptying in my kit, I've committed to only buying this little 1 oz bottle of MAC Fix + from now on, so I don't waste money if it leaks again. I will continue to buy it because it is my favorite for really getting a shimmery/metallic shadow to lay beautifully on the eye and stay well. 

Benefit Porefessional Face Primer is my favorite silicone based primer to keep in my kit for almost all of my clients. I love how it smooths out the texture of a client's skin and will always have it in my kit. I've tried other brands' versions and nothing compares to this one for me. Plus most of my clients always say "this smells so good!" and it's nice for clients to have enjoyable situations like this throughout the makeup process. Remember if you are a makeup artist, the experience of doing someone's makeup is just as important as the end result. 

This last makeup empty is a personal one, as I am always trying out mascaras from the drugstore. I have had so many people talk about Covergirl Clump Crusher and decided to try this one out. It's the Covergirl Clump Crushers Extensions Mascara in 'Very Black'. Apparently it's supposed to be like the original clump crusher formula but with buildable fiber extensions in it? I don't think it was anything special and if I remmeber correctly, I bought it by accident when wanting to try the original instead. Mental note: Read fine print better Andrea. 

Skincare Empties:

These two kind of go together because they were my two favorite makeup removers before I went clean with my skincare. I loved this solid Body Shop Camomile Sumptuous Cleansing Butter because it isn't liquid which makes it easier to travel with. It also seemed to last forever. The Garnier SkinActive Micellar Cleansing Water is also great for removing eye and face makeup with a cotton round. If you aren't concerned with clean skincare than I'd recommend them for you, but unfortunately you won't seem in my routine anymore. (In case you are wondering what I have switched to, keep an eye out for my current skincare routine post coming later this week!)

This toner is a repeat and thankfully is clean enough to stay with me through the clean skincare process! It has a few ingredients that register as a 3 but most are 1's which makes this an overall 3 or under product (my goal). There has to be at least a 50% chance that if you are reading this I've either gotten you addicted to this toner or you've heard me talk about it. The Dermadoctor Ain't Misbehavin' Healthy Toner with Glycolic & Lactic Acid is the perfect toner for people who need glycolic and lactic acid in their routine on a daily basis (i.e. many of you especially those who struggle with texture issues, uneven skin tone, breakouts, clogged pores. etc...). It's worth the splurge because it lasts over 6 months and I love that it comes in a glass bottle. I think it's made an appearance in at least 3 empties posts over the years, so you can bet I will continue to purchase it. 

I used up a pack of the CosRX Acne Pimple Master Patches and this things are my SAVIORS. I will always keep them on hand because I pop one on clean and unmoisturized skin over my blemish at night and in the morning it is significantly reduced. It works best if the blemish has come to a head already, but I am always excited to see the oil and impurities on the sticker when I remove it in the morning. It makes me feel like a science experiment and I'm weird like that. If you struggle with acne ever PLEASE do yourself a favor and click on the link and snatch some of these up. 

I got this sample of the Drunk Elephant C-Firma Day Serum and I couldn't even finish it because of the smell. I thought I could tolerate most smells if I knew the product was helping my skin but I just couldn't get over this one. I included it in this because I've heard great things about this serum but I wanted to recommend that you go into Sephora and ask for a sample to see if you can tolerate before you purchase it. 

Next up we have some sheet masks that I used up and this first one was a gift, and thankfully they still sell them on Amazon! The Secret Nature Firming Blueberry Sheet Masks are awesome. I'm happy I received a whole pack of 5 of these because after using the first one, I couldn't believe how plumped and hydrated my skin looked. My fine lines were so minimized and some even gone. It was unreal. While they contain ingredients like fragrance, that I try to stay away from, I will definitely be using up the pack. Again this is a product that I definitely recommend if you aren't as concerned with clean skincare. The other mask I used is from I Dew Care and I bought it in the Let's Get Sheetfaced kit of 14 sheet masks. Unfortunately it is no longer available, but I did like that there were many options in this kit. I definitely recommend getting a kit of different varieties of sheet masks to keep on hand so you always have something for whatever your skin is currently dealing with. 

Other Empties:

This category is for hair and body. So I have an issue with wasting products. I cannot just through products out because I no longer want to use them. I have to figure out a way to use them and this first product was no exception. I haven't bought a Victoria Secret or Bath & Body Works body product in ages, I think this one was a gift, because the quality of ingredients is just simply bad. I had this Amber Romance Victoria's Secret Body Wash and instead used about a tablespoon with my bathes to give a little bit of bubbles. This did make it last forever, but at least it's gone and I don't have to feel bad about wasting products. I'm not even going to link it because I do not recommend buying your body products from either of these places. 

These next two hair products, the Wella Professionals Enrich Shampoo & Conditioner for Fine/Normal Hair were my favorites before I switched to a cleaner option. I went through a few bottles of them and really did love them. They are great quality if you don't necessarily want clean hair care products and made my hair feel more voluminous and healthy (For reference, I have very flat and fine hair but a lot of it). 

The last product I want to share is something I've never talked about on AFB but it has to do with periods so if that bothers you here's your warning. While going clean and toxin free, I swapped out my tampons for organic cotton ones. This was actually one of the first changes I made, probably about 8 or 9 months ago! Through a recommendation of a friend (thanks Mercedes!) I went with This is L and I really do love their organic tampons. I signed up for the subscription on their website which I've linked above and received 20 tampons once a month (10 regular & 10 super) for $7.95 (including shipping). I like that with every purchase they donate to products women in need in high impact areas. So not only are you making a healthier conscious choice for yourself, but you're doing something good for other women at the same time. I will always support companies who have this business model! While I would buy L tampons again, I paused my subscription because I couldn't use them fast enough. Apparently I don't need 20 every month and they were getting backed up in my bathroom. I have also noticed the Cora tampons and decided that once I used up my This is L ones, I would give those a shot. Cora also donates products to women in need and they are organic cotton. I feel like Cora's website is more specific in how your purchase helps those in countries all over the world (including the US) which I really like. I will let you guys know how I like the Cora Tampons when I get to try them. Both companies have subscription options which is really nice so you never have to do a midnight tampon run again (Hello, we've all been there!) I like that Cora is sold on Grove Collaborative which is the online membership service that I use to purchase my natural cleaning products. 


This was definitely a longer post than normal but I hope you enjoyed seeing some of the products I've used up recently. It allows me to give you an honest opinion of the product after using it entirely. I hope you enjoyed and shout out to you if you made it to the end of this post! Comment below if you've tried anything I mentioned today!

Have a beautiful week,

Andrea 

Disclosure:

Unless noted, all products were purchased with my own money and all opinions are my own. 

Amazon links are Amazon Affiliate links meaning that I make a commission off the purchase of the product through my link. I would never recommend a product that I didn't love and all opinions are my own. I am thankful for you choosing to purchase through my links, as it helps me create more content for Andrea Fontana Beauty.


Tips for Practicing REAL Self Care

I realized recently that I haven't shared a topic on here that I talk about a lot in my non-blog life. I am just going to come out and say that I hate the phrase 'Self Care'. It's not so much the term that I hate but the trend that it has become in today's world. Stay with me. I think that taking time to yourself is crucial, but let me explain why I feel this way.

I find that the phrase 'self care' has become a trendy word for procrastination and a gold mine for the marketing of products to us. 'Practice self care and buy this bath bomb...you deserve it.' I know you've seen these campaigns and messages and frankly it frustrates the crap out of me. Taking a bubble bath is really great but if you have several things that you need to get done that night, a bubble bath can wait until tomorrow. However, if labeled as a 'self care' moment, it's fine to push off your priorities. 

If we are so stressed that we need to take a break and pause for a minute to take a bubble bath, I believe true self care is figuring out what is causing these moments of burning out and readjusting your life so it doesn't keep happening. It's crazy to keep doing the same things and expecting life to get easier if we don't self reflect and make some changes. There are no products that are going to fix the unbalanced life we are living, so today I'm offering you some tips to truly practice REAL self care and dig deeper into the stress of our lives. Use self care to really change your lifestyle so you can set yourself up for success and reduce stress and anxiety. 

Please be sure to comment below with your thoughts on the 'self care' trend and whether you agree or disagree with me.

6 questions to ask yourself to practice REAL self care:

1. What is one area of my house that I can tidy to relieve some anxiety? I am a huge believer in the idea that if your environment is messy, you will feel more anxious. Is there one space that you look at day in and day out, that could be tidier? Spend some time tackling it and I guarantee it will make your home more pleasant. 

2. What is the one thing on my To-Do list that would relieve some stress if I just did it? We all have those things on our lists that are either tedious tasks or simply no fun, but need to get done. Recognize this task as being annoying and just do it. Think about how relieved you will feel when it's done and carry that thought with you through the process to motivate you to complete it.

3. What is one thing that I don't want to think about right now but need to? This could be in many different categories of life. Sometimes we push things off or put them on the back burner because we don't want to think about them, but acknowledging them can take a huge weight off our chests. Debt is a great example of this. If you have no idea how much you owe in student loans, car loans, etc....ADD IT UP! The scariest part is looking at that total number, but once you do it, you can create a plan to get rid of it. 

4. How would I feel if I didn't let these anxious thoughts affect me? Sometimes we need to practice self care because we can't get out of our own heads. Trust me, I'm right there with you. But if we take a moment to think about how we would feel if we didn't let the stress and anxiety affect us, we give the anxiety less power and it's easier to think through it. Really try to think about the actual emotions you could be feeling instead.

5. Who can I call to just listen to me work through this stress and anxiety? Something that is really helpful for me to do is to talk to a close friend about whatever is bothering me. Venting in a sense and getting it all out, can be all we really need to feeling better. Sometimes it's helpful to hear someone say yes this is stressful and it's okay to feel this way. For me however, I like doing this because often it's helpful to have my best friend say what's the worst that could happen. 

6. Do I have a habit that I don't like and what can I do to stop it? Sometimes we don't realize the habits that we have created unless we measure them. I recommend to friends all the time to track what they spend their time doing and what the pros & cons are for each activity. If you don't like the habits you see, work to get rid of them! If it's a pretty big habit, look for support in your community to break it! 

Overall these questions encourage self reflection which I am HUGE on! I talk about it all the time with people because I believe it is so important to make changes when it's necessary and redirect what we are doing on a daily basis. I hope these questions encourage you to practice REAL self care and change your lifestyle for the better instead of supressing it with another bath bomb.  

Have a beautiful day,

Andrea


How I make Almond Milk/Flour:

This post has been so highly requested and I'm happy to finally write it for you. After doing my elimination diet a few months ago and feeling what it felt like to be eating 100% unprocessed, I was hooked. I've always had the belief that life is about balance in many aspects. I would never want to deprive myself of the foods I love but also think there is an alternative to eating heavily processed treats. I have kind of always operated on the idea that if I can make it myself I'm allowed to eat it.

IMG_4222.JPG

Almond milk isn't necessarily bad for you, but when you buy it in the stores it unfortunately has to have stabilizers and other ingredients that keep it fresh for you to enjoy at home. Making almond milk eliminates all of this processing and tastes SO MUCH BETTER. Plus, since going gluten free I like to have almond meal (aka flour) on hand and it's expensive! Making your own almond milk yields the milk, but also about 1 cup of almond pulp that you can easily turn into meal! This means it's a zero waste process and will save you money, especially if you use almond meal on a regular basis! Today I'm going to take you through how I make my almond milk and turn the pulp into meal!

First let's go over what you will need for this process:
- 1 cup of almonds (I buy mine in a big bag at Costco)
- 7 cups of water
- Vanilla or salt if wanted
- High speed blender or food processor (I use a ninja) --> Here's the one I have and LOVE (Side note: I took FOREVER to decide on a blender and this is the one I went with. I've had it for over a year and use it constantly. I can't recommend it enough if you're looking for a high quality blender but don't want to shell out the money for a Vitamix)
- Glass container to store milk up to 3 or 4 days --> I purchased this one from Amazon
- Nut Milk Bag --> I purchased this Nylon 2-pack from Amazon.

1. You'll need to soak the almonds for at least 4 hours (I usually just do it overnight) in order to soften them and make them easy to blend.

2. Empty the water that the almonds have been soaking in and add the cup of softened almonds, 7 cups of water and a splash of vanilla and sprinkle of salt to the blender. I have made it with no salt and vanilla and it was great too! Choice is up to you. If you're used to unsweetened original almond milk, leave it out!

3. Blend for 2 minutes on a high speed.

4. Pour your blended mixture through the nut bag into a bowl and squeeze all of the liquid out with your hands! I love the nylon ones I purchased from Amazon because they are super easy to hand wash and keep clean (I also use them to strain my kombucha!)

5. Store in your glass container for up to 4 days!

YES It's really that easy! Now for the almond meal:

1. Preheat your oven to 100 or 150 degrees.

2. Spread your almond pulp onto a baking sheet and break up all of the clumps with your fingers. The more liquid you squeeze out the easier this will be.

3. Bake for 1-1.5 hours until the almond meal is dry, checking on it every 15-20 min to make sure it's drying out evenly. 

4. If your blender hasn't ground it fine enough, you can put it back through the food processor, blender or even a coffee grinder to make it finer!


One of the cool things about making your own almond milk is that you can flavor it however you want! I cannot wait to add turmeric, cinnamon, and more to my almond milk in the fall to make yummy drinks (Thanks for the suggestion Detroit Wifestyles!) 

Have you ever made your own nut milk? What kinds of combinations do you do? Leave a comment below and let me know!

As always, have a beautiful day!

-Andrea

Disclosure: Amazon links are Amazon Affiliate links meaning that I make a commission off the purchase of the product through my link. I would never recommend a product that I didn't love and all opinions are my own. I am thankful for you choosing to purchase through my links, as it helps me create more content for Andrea Fontana Beauty.

June Favorites (Beauty)

Well it's officially the beginning of a new month which means it's favorites time! I'm changing things up this month and decided to do my favorites as a video instead of a blog post! Leave me a comment below if you prefer watching instead of reading my favorites! Thank you for watching! Also make sure to comment below what your favorite products were this month! 

Here are the products and links I mentioned in order of appearance:

NYX Honey Dew Me Up Primer https://amzn.to/2zd0UE3

NYX Dewy Finish Makeup Setting Spray https://amzn.to/2NwZFD4

Stila Magnificent Metals Glitter & Glow Liquid Eye Shadow https://amzn.to/2tVa6rW

Jordan Samuel Skin etOILe with Retinol Treatment Oil https://jordansamuelskin.com/products...

Coola Suncare Organic Sunless Tanning Anti-Aging Face Serum https://amzn.to/2lUofAY

Pacifica Rose Flower Hydromist with Kombucha https://amzn.to/2KzCZ7k

Acure Argan Oil & Pumpkin Shampoo and Conditioner https://amzn.to/2tUKdbM

Burt's Bees Milk and Honey Body Lotion https://amzn.to/2MTD56v

 FTC: All products were purchased with my own money. All opinions are my own.

Disclosure: Amazon links are Amazon Affiliate links meaning that I make a commission off the purchase of the product through my link. I would never recommend a product that I didn't love and all opinions are my own. I am thankful for you choosing to purchase through my links, as it helps me create more content for Andrea Fontana Beauty. This does not affect the price that you pay.

Have a wonderful start to July,

Andrea

Changing things up this month and decided to do my favorites as a video instead of a blog post! Leave me a comment below if you prefer watching instead of reading my favorites! Thank you for watching! Also make sure to comment below what your favorite products were this month!