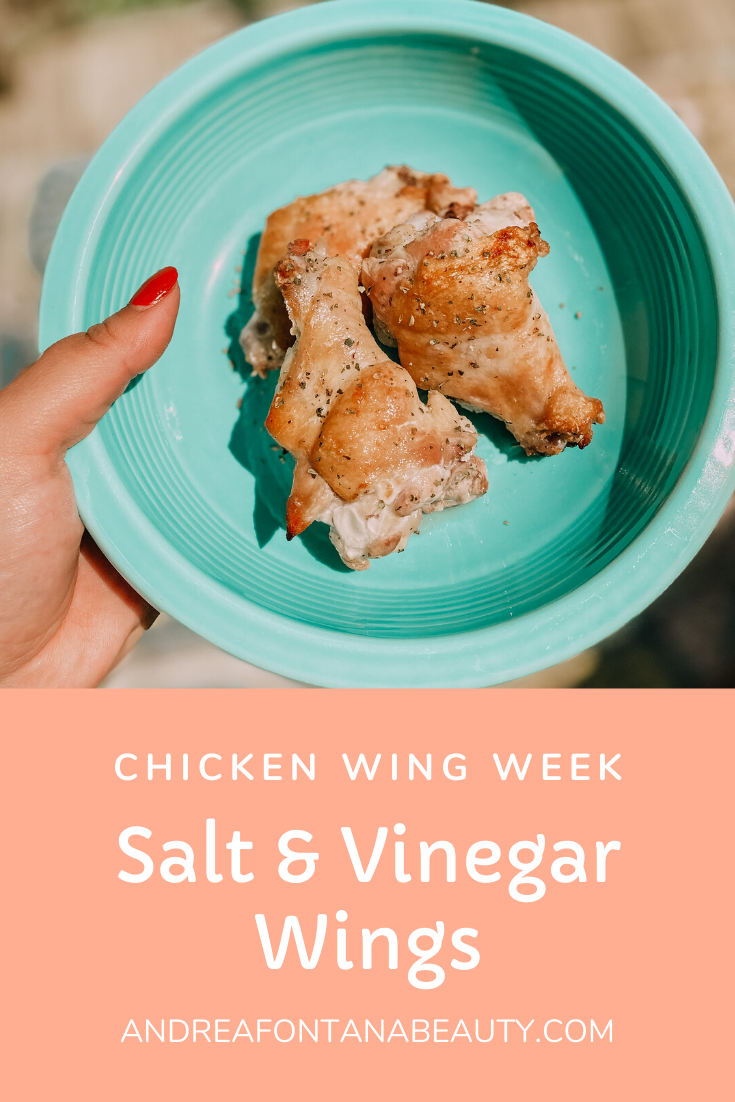
Chicken Wing Week: Day 6 - Salt & Vinegar Wings

This is my last recipe of Chicken Wing Week! I hope you’ve enjoyed this week because I’ve had a lot of fun. Margie has one more recipe coming at you tomorrow!

salt and vinegar chicken wings

Salt & Vinegar Chicken Wings

This recipe is tailored towards two adults and makes about 12 wings. Multiply as needed.

Ingredients:

Marinade

  • 1 TB of avocado or olive oil

  • 2 TB red wine vinegar

  • 1 tsp kosher salt

  • 1/2 tsp black pepper

Other Ingredients

  • 2 TB avocado oil

  • 2 TB red wine vinegar

  • 1 tsp salt

  • 1/2 tsp dried oregano

  • 12-14 traditional bone-in chicken wings (about 2 #)

  • Helpful tools: wire rack that fits inside your baking sheet, tongs, aluminum foil, and a meat thermometer.

Directions:

  1. Preheat your oven to 425 degrees F.

  2. In a large mixing bowl, mix your quick marinade of oil, vinegar, salt and pepper. Toss your wings in the marinade, making sure to coat every wing evenly. NOTE: Make sure you don’t let the wings sit in the marinade for too long (more than a couple minutes) because the acid from the vinegar will start to cook the chicken).

  3. While you wait for your oven to preheat, cover your baking sheet with a layer of aluminum foil and place your wire rack on top. NOTE: If you don’t have a wire rack, that’s ok too! You’ll just need to flip your wings half way through the baking time. The wire rack allows for better air circulation and crispier, evenly cooked wings.

  4. Bake in the center rack of the oven for 25 minutes at 425 degrees F. If you don’t have the wire rack, make sure you flip the wings halfway through this 25 minute cooking time.

  5. Remove the wings from the oven and turn the oven onto broil. This is the part that is magical for the crispy skin, but you must keep a close eye on it since everyone’s oven is different, and broiling happens quickly. I normally broil wings for 2 minutes in my oven, but for this recipe I want the skin to be extra crispy, to compensate for the super thin sauce. Therefore I broiled for 3 minutes on each side, with the wings on the top rack. They should be close to the broiler but not touching ANY flames. Therefore, they broil for 6 minutes total.

  6. It’s important to measure the temperature of your wings to make sure they are cooked throughout and at least 165 degrees F. If you prefer a drier wing, you can take them up to 175-180 degrees F. This part is up to you!

  7. While your wings are broiling, it’s time to mix up the salt & vinegar sauce. In a large mixing bowl that can fit all of your wings, mix 2 TB avocado oil, 2 TB red wine vinegar, 1 tsp of salt, and the dried oregano. Adjusting the ratio of oil to vinegar here is totally up to you. (i.e. If you love a really acidic salt & vinegar flavor, try using more vinegar)/

  8. Once your wings are done broiling, using tongs, transfer them to your mixing bowl and coat with sauce really well.

  9. To serve, you can pour a little extra sauce on top and top with a little extra oregano if you’d like.

I hope you enjoy this wing recipe and stay tuned for the last recipe tomorrow over on Margie’s blog <<click here>>!

CHICKEN WING WEEK RECIPE ROUND-UP:

Day 1 - Dre’s Original Baked Wings

Day 2 - Margie’s Thai Curry Dry Rub Grilled Wings

Day 3 - Mexican Dry Rub Wings

Day 4 - Chicken Tikka Masala Wings

Day 5 - Margie’s Strawberry Sriracha BBQ Glazed Wings

Day 6 - Salt & Vinegar Wings

Have a great weekend,

Andrea

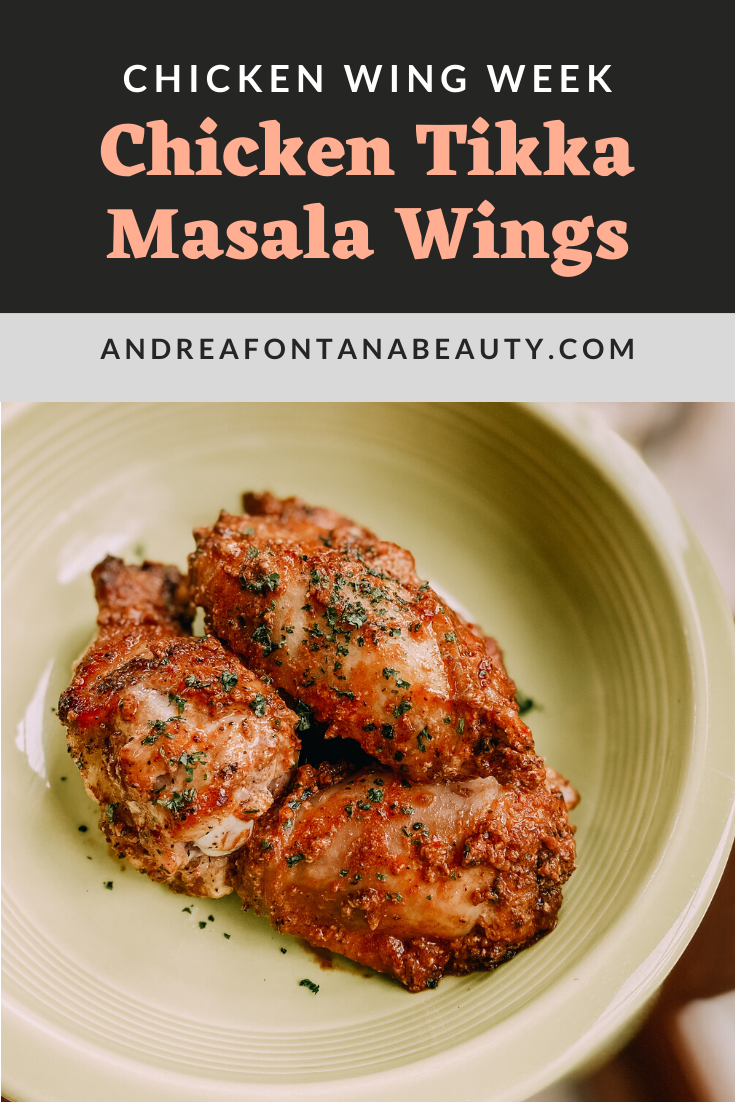
Chicken Wing Week: Day 4 - Chicken Tikka Masala Wings

Chicken Tikka Masala is probably Mikey’s favorite thing that I make. He asks for it every week, so I thought why not get creative and make the same magical spice combinations in wing form?

chicken tikka masala wings

Chicken Tikka Masala Wings

This recipe makes enough for about 24 wings!

Ingredients:

Marinade

  • 1 cup plain Greek yogurt

  • 1 TB lemon juice

  • 1 TB garam masala powder

  • 2 tsp ground black pepper

Other Ingredients

  • about 2 dozen traditional bone-in chicken wings (about 4 #)

  • 2 TB Avocado Oil

  • 3 TB butter

  • 1 TB minced garlic

  • 1/4 cup tomato paste

  • 1/2 cup half n half, heavy cream, or full fat coconut milk

  • 4 tsp garam masala

  • 1 tsp paprika

  • 1/2 tsp salt

  • Helpful tools: wire rack that fits inside your baking sheet, tongs, aluminum foil, and a meat thermometer.

Directions:

  1. In a large mixing bowl, mix all of your marinade ingredients. Add your wings and coat them evenly. Cover your bowl and put in the refrigerator to marinate for 30-60 minutes. NOTE: I like to cover use a bowl that has a lid (i.e. Pyrex) so that I can shake the wings up a bit to coat them better.

  2. Remove your wings from the refrigerator and preheat your oven to 425 degrees F. Cover your baking sheet with a layer of aluminum foil and place your wire rack on top. NOTE: If you don’t have a wire rack, that’s ok too! You’ll just need to flip your wings half way through the baking time. The wire rack allows for better air circulation and crispier, evenly cooked wings.

  3. Heat a big soup pot or dutch oven to medium-high heat, then add your avocado oil. Using your tongs, place some of your wings skin side down, into the pan. Hearing a sizzle is VERY important at this step. If you don’t hear a good sizzle, your pan isn’t warm enough yet and you won’t get a good sear to lock in the juices. It’s also important not to over crowd your pan because then you will steam your wings instead of searing them. Make sure they aren’t touching. You will most likely need to do this step in a couple batches depending on the size of your pot and amount of wings you are making.

  4. Sear the chicken wings for about 3 minutes until golden brown, then flip and repeat on the other side. Once both sides are seared nicely, use your tongs to remove the wings and place on the wire rack, that is on top of your baking sheet and repeat the process until all of your wings are seared and on your wire rack.

  5. Bake in the center rack of the oven for 25 minutes at 425 degrees F. If you don’t have the wire rack, make sure you flip the wings halfway through this 25 minute cooking time.

  6. While the wings are baking, it’s time to make your chicken tikka masala sauce to coat your wings! Reduce the heat of your soup pot to medium heat and add 2 TB of butter. Once melted, add your minced garlic and saute until fragrant (about 30-60 seconds).

  7. Add your tomato paste, half and half, and water and mix well until combined. Add 4 tsp garam masala, paprika, and salt. Allow to come to a simmer, reduce heat a little to medium-low and let cook until your wings are done baking.

  8. Remove the wings from the oven and turn the oven onto broil. This is the part that is magical for the crispy skin, but you must keep a close eye on it since everyone’s oven is different, and broiling happens quickly. In my oven, I broil for 2 minutes on each side, with the wings on the top rack. They should be close to the broiler but not touching ANY flames. Therefore, they broil for 4 minutes total. NOTE: It’s important to measure the temperature of your wings to make sure they are cooked throughout and at least 165 degrees F. If you prefer a drier wing, you can take them up to 175-180 degrees F. This part you can adapt to your preferences.

  9. While wings are broiling, add your last TB of butter to the sauce and let melt and mix in evenly.

  10. Once your wings are cooked to your preference, toss them in a couple TB of sauce to coat and serve. I like to serve with a little chopped cilantro on top but that is optional.

I hope you have been enjoying Chicken Wing Week so far! We still have THREE more recipes coming at you! Head to Margie’s blog tomorrow <<click here>> because she’s up next and you don’t want to miss her next creation!

Happy Wednesday,

Andrea

Chicken Wing Week: Day 3 - Mexican Dry Rub Wings

1[1].png

Mexican Dry Rub Wings

This recipe makes enough dry rub for about 24 wings!

Ingredients:

  • 2 TB chili powder (feel free to add more if you want them spicy!)

  • 1 TB garlic powder

  • 1 TB onion powder

  • 1 TB cumin powder

  • 1 TB coconut sugar (or brown sugar)

  • 1 tsp kosher salt

  • about 2 dozen traditional bone-in chicken wings (about 4 #)

  • Helpful tools: wire rack that fits inside your baking sheet, tongs, aluminum foil, and a meat thermometer.

Directions:

  1. In a large mixing bowl, mix all of your spices well to create your dry rub. Add your wings and coat them evenly in the dry rub. Cover your bowl and put in the refrigerator to marinate for 30-60 minutes.

  2. About 5 minutes before your marinading is over, preheat your oven to 425 degrees F. Cover your baking sheet with a layer of aluminum foil and place your wire rack on top. NOTE: If you don’t have a wire rack, that’s ok too! You’ll just need to flip your wings half way through the baking time. The wire rack allows for better air circulation and crispier, evenly cooked wings.

  3. Remove your chicken wings from the fridge and lay them on your wire rack for 25 minutes at 425 degrees F. If you don’t have the wire rack, make sure you flip the wings halfway through this 25 minute cooking time.

  4. Remove the wings from the oven and turn the oven onto broil. This is the part that is magical for the crispy skin, but you must keep a close eye on it since everyone’s oven is different, and broiling happens quickly. In my oven, I broil for 2 minutes on each side, with the wings on the top rack. They should be close to the broiler but not touching ANY flames. Therefore, they broil for 4 minutes total.

  5. It’s important to measure the temperature of your wings to make sure they are cooked throughout and at least 165 degrees F. If you prefer a drier wing, you can take them up to 175-180 degrees F. This part you can adapt to your preferences.

I hope you enjoy this wing recipe and stay tuned to the rest of CHICKEN WING WEEK! Make sure you head to Margie’s blog <<click here>> to check out her Thai Curry Dry Rub Wing recipe from yesterday. I’ll be back tomorrow with new flavors!

Have a great day,

Andrea

Chicken Wing Week: Day 1 - Dre's Original Baked Wings

Welcome to a very exciting collaboration with one of my very best friends Margie (@margiefoodie) over at MargieFoodie.com! Today, May 3rd, through Saturday, May 9th, one of us will share a chicken wing recipe on either of our blogs. I’ll recap everything at the end of the week, in case you miss anything, but it is bound to be an amazing week.

original baked wings

First up today, I’m sharing a baked wing recipe that’s a great starting point for any of your chicken wing needs. I think it’s a great place to begin this flavorful week.

Dre’s Original Baked Wings

I typically make 6-8 wings per adult, so this recipe is tailored towards two adults. Multiply as needed.

Ingredients:

  • 3 TB of avocado or olive oil

  • 3 TB red wine vinegar

  • 1 tsp dried parsley

  • 1 tsp kosher salt

  • 1 tsp black pepper

  • 12-14 traditional bone-in chicken wings (about 2 #)

  • Helpful tools: wire rack that fits inside your baking sheet, tongs, cast iron grill pan, aluminum foil, and a meat thermometer.

Directions:

  1. Preheat your oven to 425 degrees F.

  2. In a large mixing bowl, mix your quick marinade of oil, vinegar, parsley, salt and pepper. Toss your wings in the marinade, making sure to coat every wing evenly. Set to rest while you heat your grill pan and prep your baking sheet. NOTE: Make sure you don’t let the wings sit in the marinade for too long (more than a couple minutes) because the acid from the vinegar will start to cook the chicken).

  3. On the stove, heat a cast-iron pan (grill pan is preferred but not necessary), to medium-high heat. While you wait for it to warm up, cover your baking sheet with a layer of aluminum foil and place your wire rack on top. NOTE: If you don’t have a wire rack, that’s ok too! You’ll just need to flip your wings half way through the baking time. The wire rack allows for better air circulation and crispier, evenly cooked wings.

  4. Once your cast iron pan is ready, use your tongs to place about half of your wings skin side down, into the pan. Hearing a sizzle is VERY important at this step. If you don’t hear a good sizzle, your pan isn’t warm enough yet and you won’t get a good sear to lock in the juices. It’s also important not to over crowd your pan because then you will steam your wings instead of searing them. Make sure they aren’t touching. You will most likely need to do this step in 2-3 batches depending on the size of your pan and amount of wings you are making.

  5. Sear the chicken wings for about 3 minutes until golden brown, then flip and repeat on the other side. Once both sides are seared nicely, use your tongs to remove the wings and place on the wire rack, that is on top of your baking sheet.

  6. Once all of your wings are seared, bake in the center rack of the oven for 15 minutes at 425 degrees F. If you don’t have the wire rack, make sure you flip the wings halfway through this 15 minute cooking time.

  7. Remove the wings from the oven and turn the oven onto broil. This is the part that is magical for the crispy skin, but you must keep a close eye on it since everyone’s oven is different, and broiling happens quickly. In my oven, I broil for 2 minutes on each side, with the wings on the top rack. They should be close to the broiler but not touching ANY flames. Therefore, they broil for 4 minutes total.

  8. It’s important to measure the temperature of your wings to make sure they are cooked throughout and at least 165 degrees F. Mikey prefers a drier wing, so sometimes I take them up to 175-180 degrees F. This part you can adapt to your preferences.

The rest is totally up to you! You can add your favorite wing sauce or eat them as is.

I hope you enjoy this wing recipe and stay tuned to the rest of CHICKEN WING WEEK! Head to Margie’s blog tomorrow <<click here>> for tomorrow’s chicken wing recipe!

Have a great start to your week,

Andrea