3 Delicious Veggie Sides For Your Back Pocket

Can you believe Thanksgiving is next week? Even thought I put my Christmas Tree up yesterday, it doesn’t feel like the holidays are as close as they really are. Just in case the holidays sneak up on you like I know they will for me, I decided to share three recipes that you can whip up in no time and bring to your holiday dinners in a pinch.

This first one is one that I bring to every holiday dinner in my family. My nieces always ask my sister if I’m going to bring “my really good potatoes”. While they do take a little bit to bake in the oven, they are super easy. If you are in a pinch, slice your potatoes thinner so they cook quicker!

Tyler Florence’s Scalloped Potato Au Gratin

Next up we have a mushroom side that is great if you’re bringing a dish to make at someone’s house, but don’t want anything that has to go in the oven. We all know how vital that oven space is. These are super quick as well which is nice when you are in a pinch!

Laura Vitale’s Parmesan Sauteed Mushrooms

Lastly, I want to share how I make my yummy sweet potato fries/wedges because what’s thanksgiving without a little sweet potato! I guarantee these will be a hit. You can mix up the seasonings and do whatever herbs you want, but I personally love basil. Rosemary is great too!

Sweet Potato Wedges

  • 3 Sweet Potatoes

  • 2 TB of minced garlic, to taste

  • 3 TB Avocado Oil, or oil of your choice

  • 1 TB Dried Basil

  • Kosher or Sea Salt & Freshly Ground Black Pepper

Preheat oven to 450 degrees. Peel your sweet potatoes and cut each potato lengthwise into wedges. Toss wedges in a bowl with Avocado Oil, basil, garlic, salt & pepper. Line baking sheets with parchment paper and spread wedges onto parchment, making sure they are not touching. Bake for 25 minutes, making sure they are starting to brown and crisp. Flip over and bake for another 20 minutes or until crispy and brown all over. Exact time varies per oven.

I hope you try these recipes out! If you do, let me know what you think and be sure to comment below any of your favorite holiday recipes!

Remember to take a moment every day and practice gratitude,

Andrea

Tips for Hosting an Easy Dinner Party

It is no secret that I love to cook. Feeding people is my love language and my house will always be open to transform empty bellies into full and happy ones. I hosted a dinner party the other night and when I shared a few snippets of it on Instagram, a few of you reached out and asked me to share my tips on how to make hosting a dinner party easier. I am proud to say that it was amazing and I was able to create a dinner party magic in less than 2 hours. You read that right. I started cooking/setting up around 4:45 and my guests walked through the front door at 6:30. So how did I do it? I will show you how.

Planning:

In order to whip something like this up so quickly, you have to plan. I did a few major things that made this night super easy for me:

  1. I planned my menu out at least a week in advance and checked with all of my guests that they were fans of foods that not everyone loves, i.e., mushrooms in this case. I chose dishes that were not super detailed and needy, so that I could be cooking multiple things at once (I’ll get more into this in a little bit).

  2. I grocery shopped the night before and left everything out on my counter that wasn’t perishable, and put everything together in the fridge that I’d need. This allows you to pull everything out and not go searching through your cupboards/fridge trying to find each ingredient. You’d be surprised how much time you can save when you don’t have to keep walking to the pantry.

  3. I made a rough timeline of what I wanted to cook when. For example, my appetizer was something that needed to sit and stew a little, so I started this first. This allowed me to not have to think about what I needed to do next because it was all written down for me. I just check things off my list.

Decor:

When it comes to decor, I love to have things like books, place mats, candles and such all around. Instead of getting extra decor out to decorate my table, I just used what was already sitting out around me. I walked around my living room and grabbed things like pumpkins and candle sticks, and brought them to my table. I have a little storage cupboard by my front door, who’s top houses my keys and such, but inside I actually hide away all of my entertaining dishes, so that when it’s time to bring them out, they are all in one spot.

Personally, I find a rustic and cozy atmosphere to be the most appealing at a dinner party, so don’t get to stressed about things matching. In case you didn’t notice in the pictures above, I only had four of the gray and white tassel place mats, so I just grabbed a gray and white striped tea towel from my kitchen and added it for my 5th place setting. I’m not big on patterns matching perfectly but I generally always buy my entertaining dishes in neutral colors so that they always go together well enough.

Also, don’t be afraid to get out of the box and get creative with items that might not normally be used on the table. I like playing with height, so I stacked some big and really old coffee table books about Italian food right in the center of the table and placed my bowls for olives on them.

Cooking:

Now for the main portion of the planning and why this dinner party was so easy, did I mention everything was Gluten and Dairy Free? Here are the things I did to make my life easy:

  1. I chose recipes that didn’t need to be babysat, but would still wow my guests.

  2. I baked my pumpkin spice cake the morning of the dinner party at 6:30 am and did yoga while it was in the oven. BAM Kill two birds with one stone people. Also, you will automatically fill your house with the aroma of dessert all day which is a great way to start off prepping for a dinner party!

  3. My appetizer was a slow cooked tomato and garlic spread for crackers (recipe to come in a special announcement). I also set out two kinds of olives and would normally do cheese as well if the crowd wasn’t dairy-free.

  4. I also made a super easy and light mushroom soup because once the onions and mushrooms are sauteed and seasoned, it literally sits on the corner burner and stews for a little while, which means you can do other stuff! (Recipe also coming in that super exciting announcement…haha)!

  5. My entree was a homemade vodka sauce (I swear by this recipe from Rachael Ray) over brown rice and red lentil pastas. Can you guess why I picked it? You’re right, it’s super quick and easy and only stews on the stove for like 20 minutes! But you’re actually making a homemade sauce so it tastes like heaven.

If there is one piece of advice I can give you for hosting a dinner party it’s this….CLEAN YOUR DISHES AS YOU GO! There is nothing worse than having the world’s best dinner party full of laughter and happy tummies and then everyone walks out the door and you have a WHOLE kitchen to clean and you get depressed and want to ignore it and walk straight to your bedroom to sleep instead. So I always do this… While I’m cooking I wash every dish I can at every chance I get. I’ll even start placing food in their serving plates so that I can wash the pots they were cooked in. I even go as far as to wipe up my counters and stove before anyone arrives. This way the only things left to clean afterwards are the dishes you eat on and the serving plates. You can quickly rinse all the food off so they are mostly clean, load them in the dishwasher or leave them in the sink for the next morning and get to sleep instead.

I love dinner parties because of how relaxed and enjoyable they are. If you plan ahead and do certain tricks, you can make it enjoyable to host as well. If you have any tips or recipes you love for hosting dinner parties, be sure to comment below! I hope you enjoyed this post and remember; the details aren’t necessarily the most important part of the dinner. The food is a vehicle and excuse to experience the laughs, the stories, and the love among your amazing guests.

Happy hosting!

Andrea

Be Your Own Valentine First

Happy LOVE Day. When I was planning out my posts for the month of February, my mind went initially to makeup but I knew very quickly that I wanted to write a post about self love on Valentine's Day. 2018 has really been an interesting year for me so far. While I feel like it has flown by in two seconds, I feel like a lot of self growth has already happened. A lot of this could be due to the fact that I started my own business and really dove into the unknown. The path isn't laid out for me, so I've had to do a lot of trial & error and observing along the way. Regardless, my mind has been constantly full of self reflection and I wanted to pass along some things that I've noticed. Warning: This post might be all over the place, so bear with me. 

First off, I want you to think about Valentine's Day differently this year. Instead of thinking about candy and roses, think about being your own Valentine first, regardless of whether or not you have a Valentine. Look at Valentine's Day as a way to evaluate whether you are really creating goals and working towards them. Are you creating the life that you want for yourself? If you're in a relationship, do you push each other to go after your dreams and support each other when needed? If you're not in a relationship, this is the perfect time to cultivate more self love for yourself if it's lacking. 

Let me tell you a little story. So far this year, I've accomplished some things that I'm really proud of. A few of them brought about so much anxiety and stress beforehand, that I found myself doubting my talents, wondering if I was crazy for saying yes to these things. Then I realized that the fear of the unknown was creeping in and making me feel unworthy, creating this voice in my head. I knew I was talented enough and that they were going to turn out well. I found myself sitting in my car one morning and I had this realization. I was getting down on myself for feeling nervous and feeling unworthy, but then I realized that I don't necessarily need to turn off these voices but look at them a little differently. That feeling of nerves was due to the fact that I was challenging myself and trying something new. I'm learning, growing and getting out of my comfort zone and that's what life is all about, right?

It's ok to do something that terrifies the shit out of you! In fact I encourage you to go try something that does. Life really is a roller coaster and in order to have those strong and happy feelings of accomplishment, I have to also accept that I might have to deal with nerves and be terrified at times. Be gentle and kind to yourself. Think about what you would tell your best friend if they were in the same situation. Would you be hard on them or would you be kind and gentle in the moment and enforce how capable they are? Now be that kind to yourself.

You cannot be in a healthy relationship with another person if you don't have a healthy relationship with yourself first. Don't for one second get down on yourself if you don't have a Valentine this year, because you never know what is around the corner. Check in with yourself today and really ask yourself how you are doing and if you like the direction you are headed. If not, make the adjustments that are necessary. If you don't know how to make those adjustments, recognize that a change is needed and that you are willing to figure it out because you love yourself. It is never too late to re-direct down a path that is better for you. Only you can know what your heart desires, so make sure you are taking the time to stop and figure it out. I've learned so far this year that this is a learned habit, and if you don't force yourself to do it, it's easy to get wrapped up in the busyness of life and never figure it out. 

If anything, I hope reading this post inspires you to take at least 15 minutes to yourself and evaluate your life. Anyone can make the changes necessary to create a happy and fulfilled life, but not everyone is willing to do the work to make it happen.

I hope you decide to love yourself first today and have a magical Valentine's Day!

Know you are so loved,

Andrea


Romantic & Soft Valentine's Day Makeup Tutorial

I'm back with the second makeup tutorial for Valentine's Day! Over on my Instagram (link is to the right-->) I created a poll in my stories asking if you wanted to see a romantic & soft makeup look or a bold & daring one. I already created the bold & daring, so here is the second one, romantic & soft!

This time around, I created a look that is much more subtle, but still just as beautiful as the last. I used only one palette, The Jaclyn Hill Palette from Morphe, to create the whole look! It was my first time using any Morphe eyeshadows and I really fell in love with this palette. I can't wait to create some more looks with it.  Products used are listed in the description of the video on YouTube, so be sure to click on the video and visit it there if you want details!

Remember, just like the last look, you can swap out any shadows for the ones shown and make the look your own. 

Here's a better look at the shadows that I used!

IMG_1482.JPG
IMG_1483.JPG
IMG_1485.JPG

As I mentioned in the video, if you have any requests for specific looks or palettes to use to create looks, leave a comment below to let me know!

Have a beautiful start to your week,

Andrea

Frugal Valentine's Gift Guide

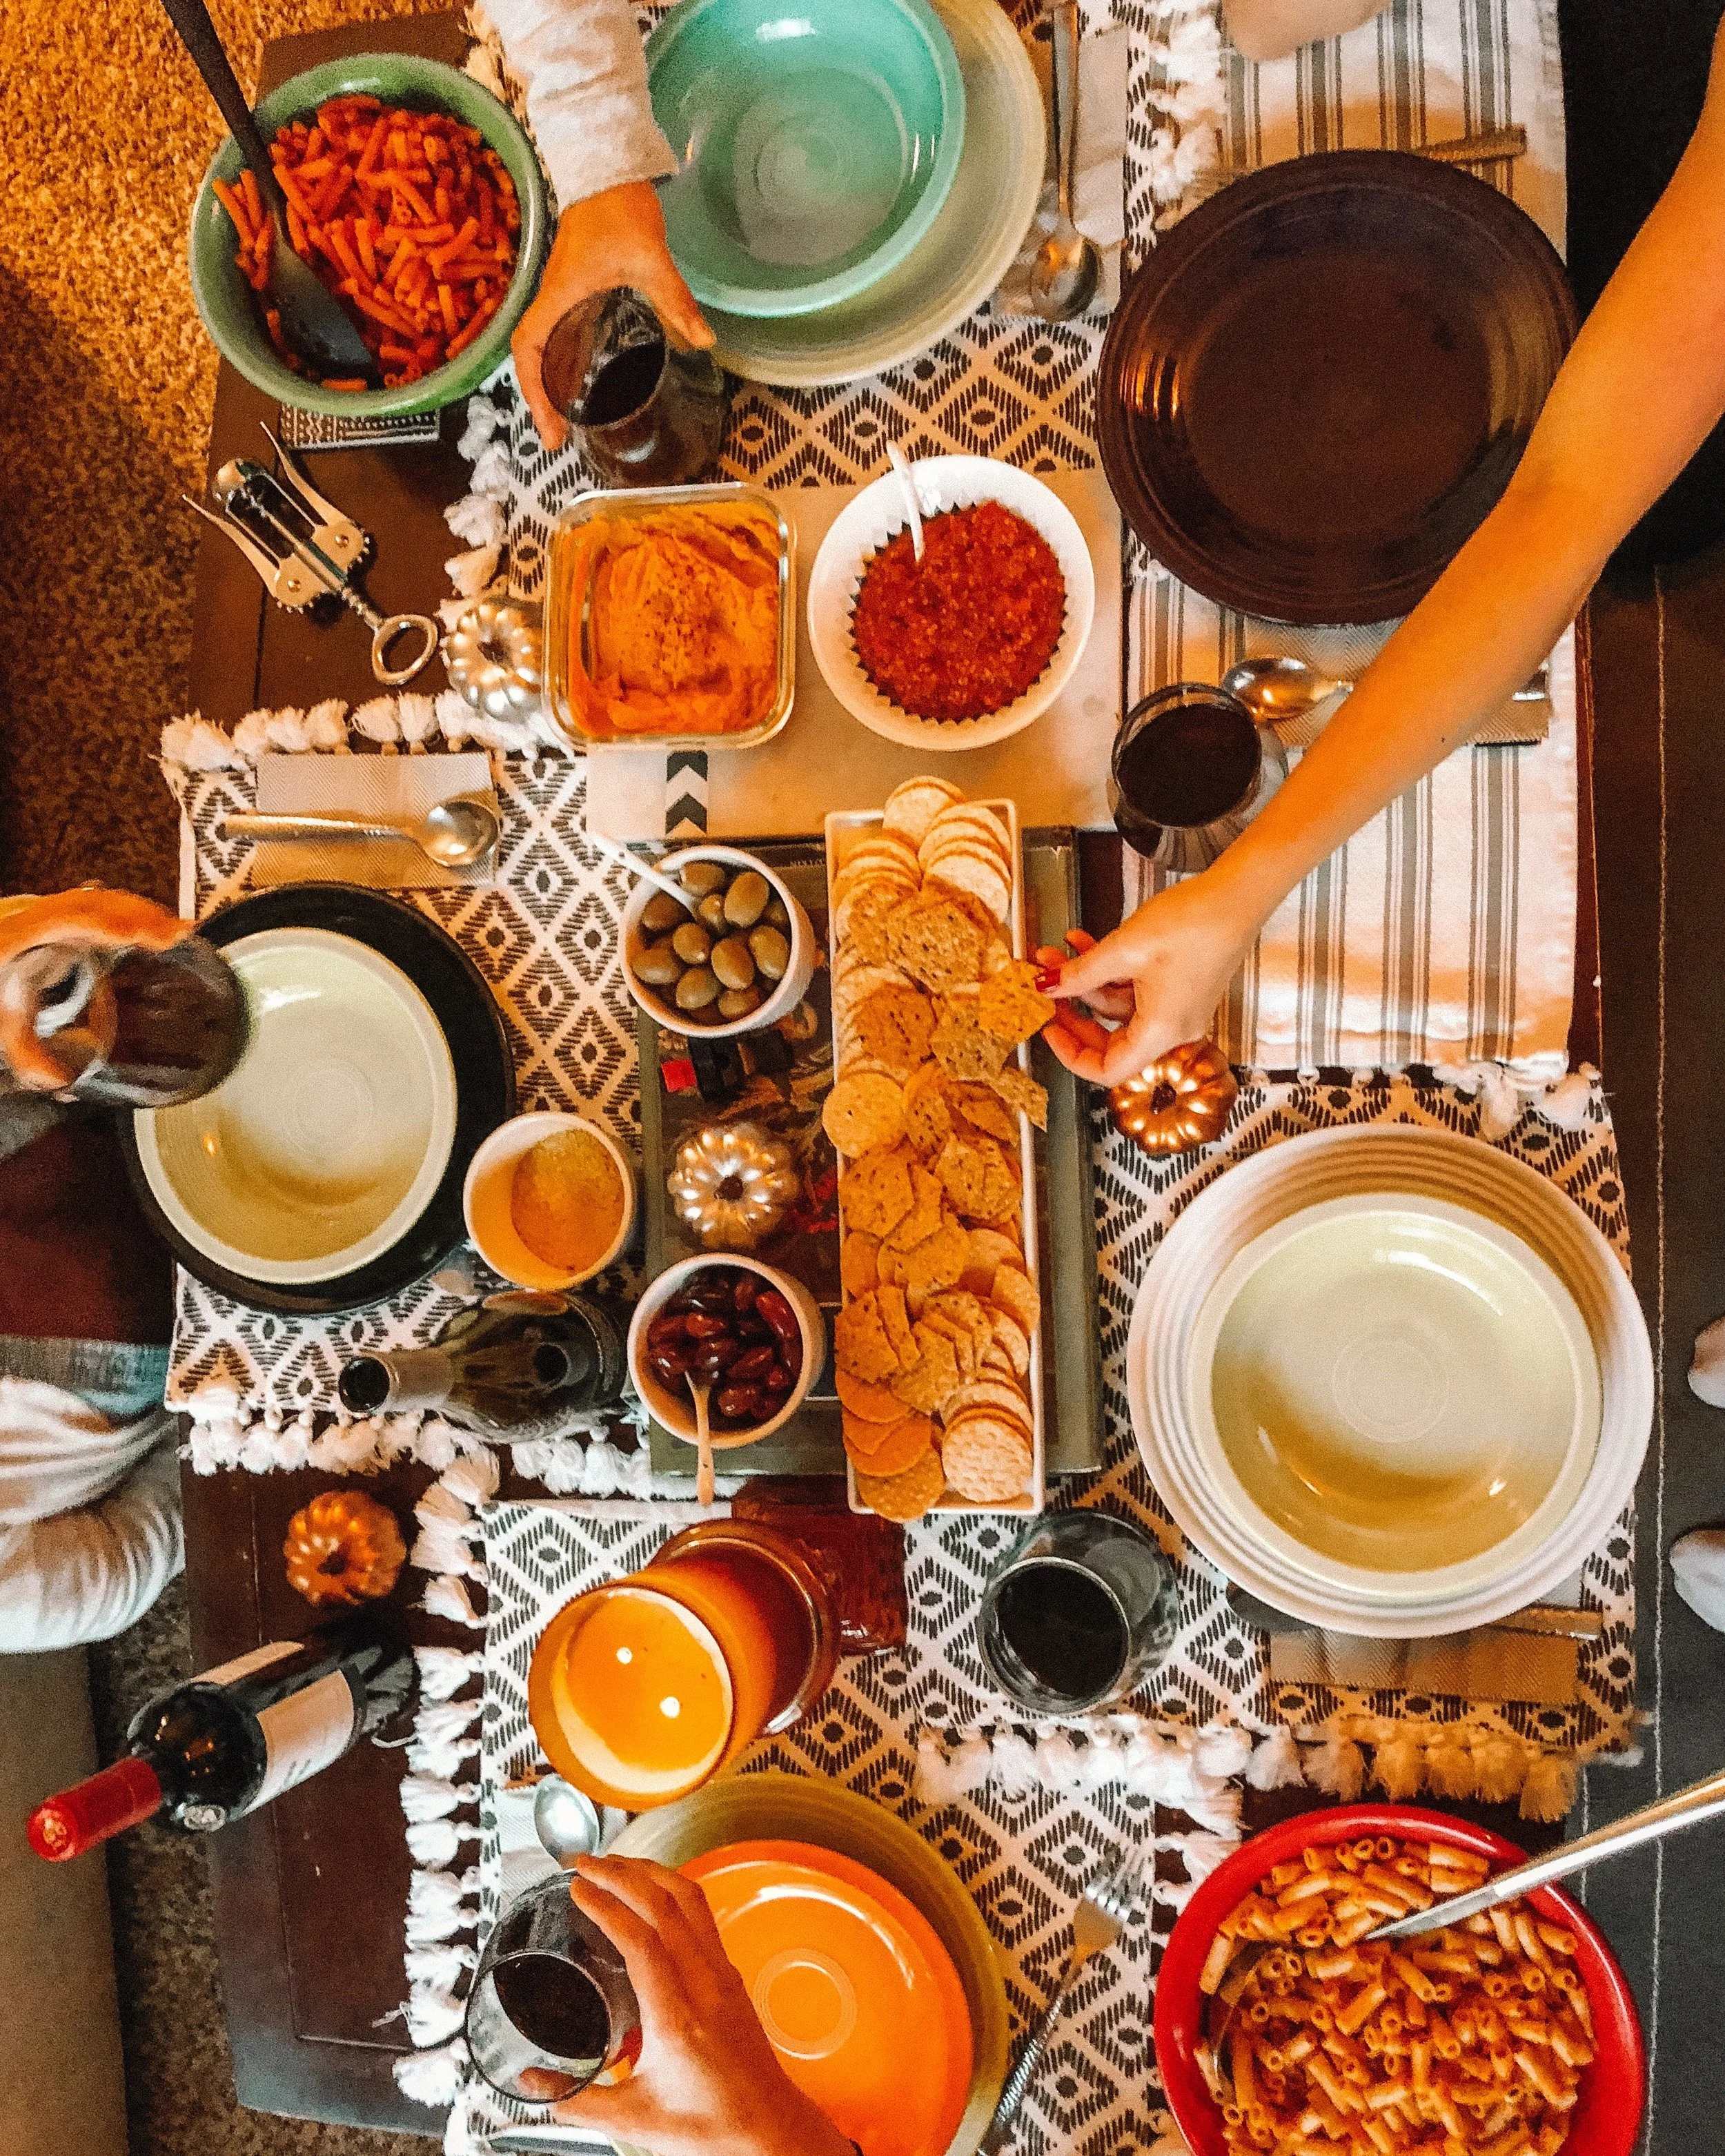
I wanted to do something a little different than a typical gift guide for Valentine's Day, so today I've compiled a list of 10 ideas for frugal gifts. You don't have to spend a lot of money on a gift in order for it to be special. I personally don't make a huge deal out of Valentine's Day, so these gifts are more my style.

1. Cook a favorite meal or dessert. I almost didn't mention this one because it's so obvious, but cooking is how I show my loved ones how much I love them, so it wouldn't be my gift guide if I didn't include it. Even if you're not a big cook, make an easy dessert. Cooking for someone is a really inexpensive and kind way to show someone you care. 

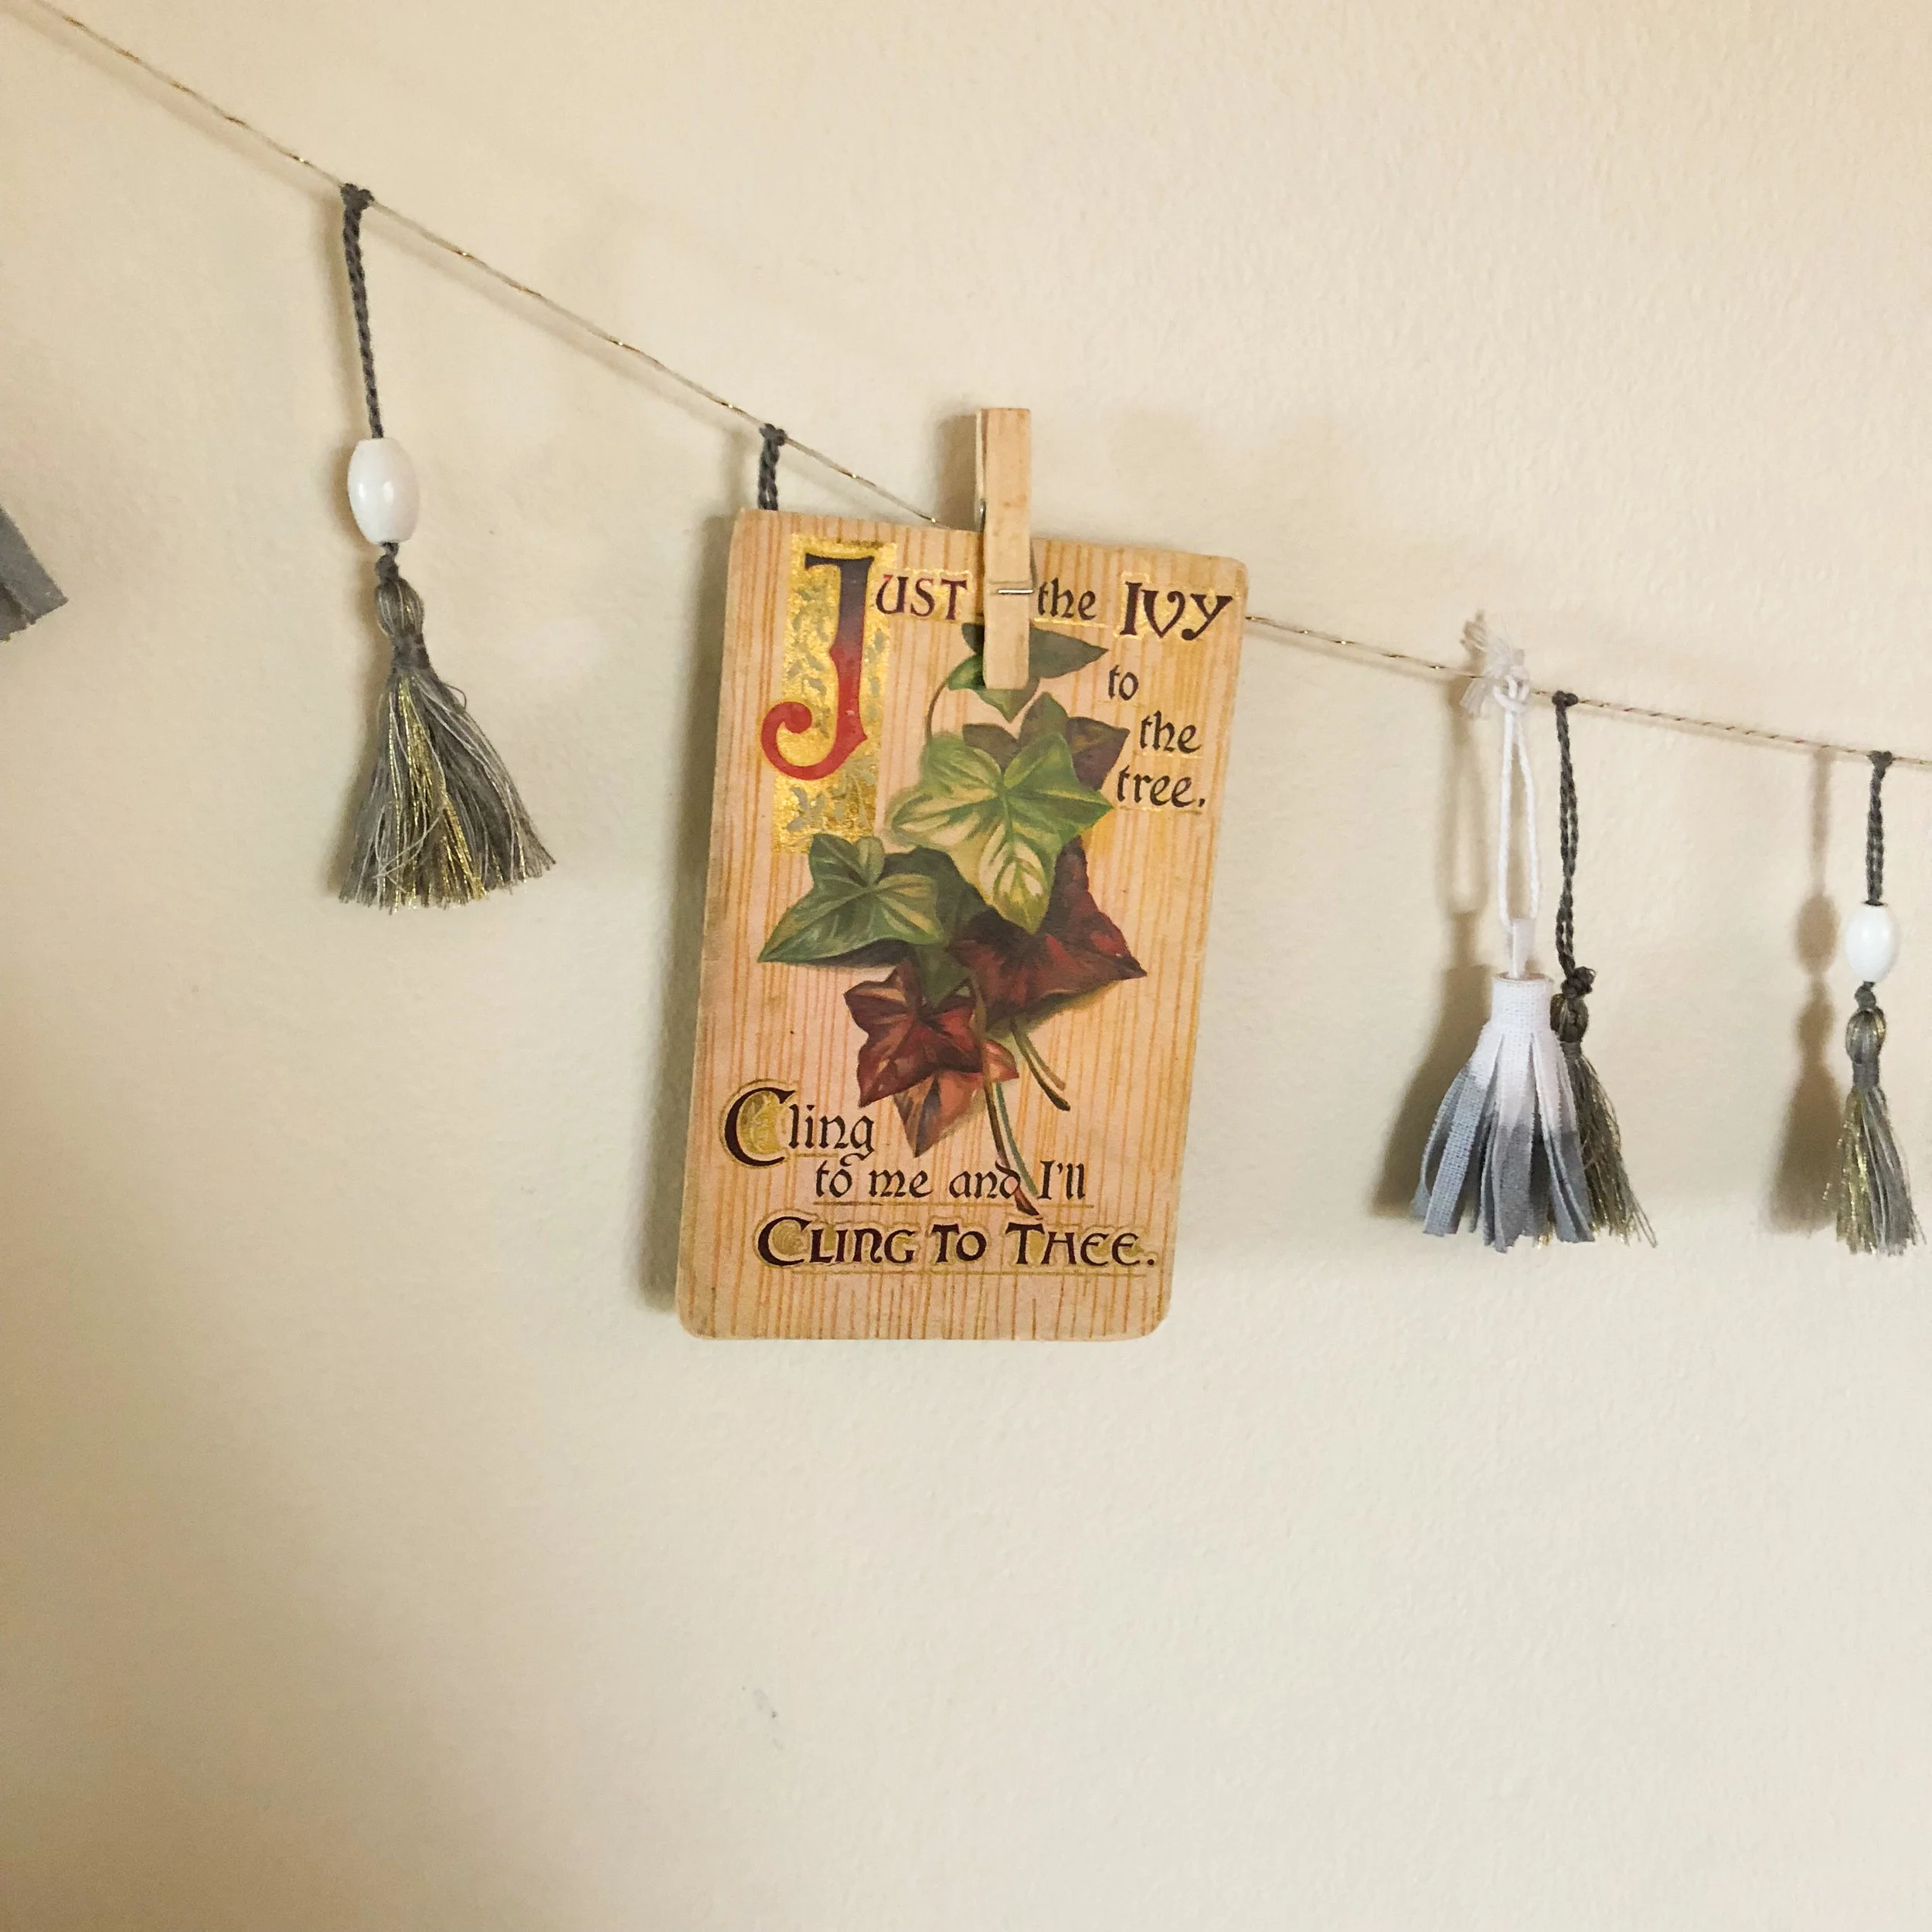
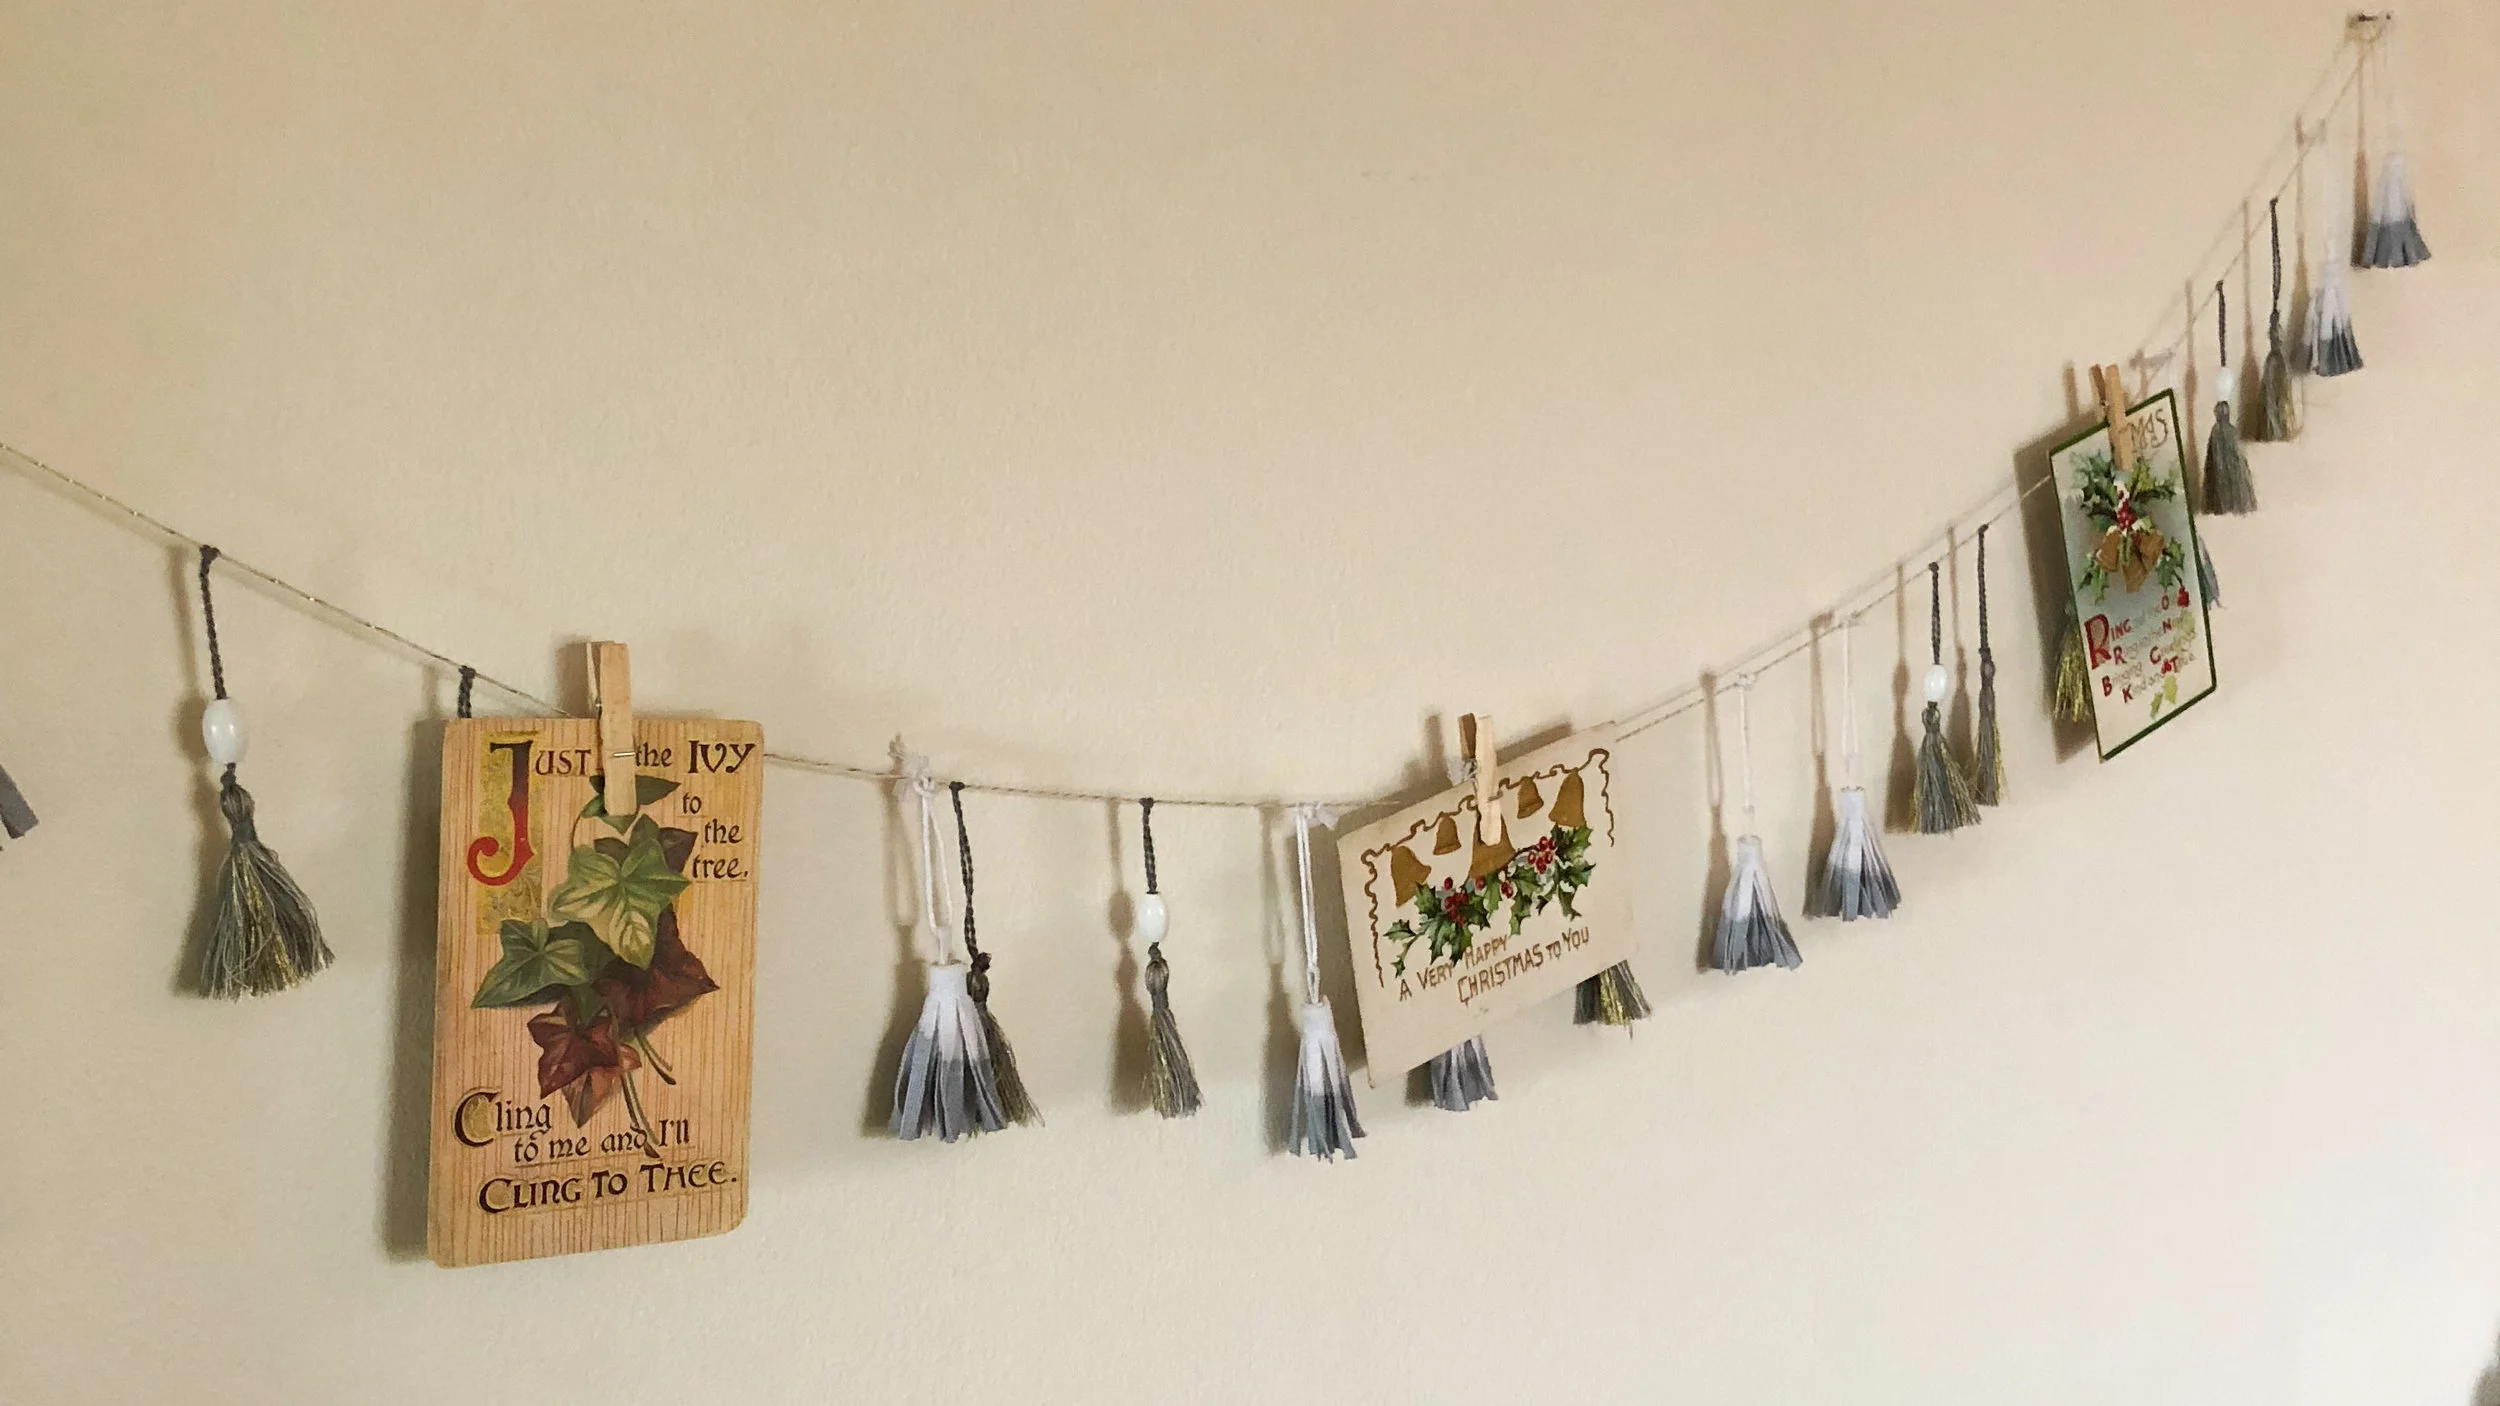
2. Make a handmade Valentine/find an antique one. I love handmade cards but especially valentines. As I get older, I've started to really treasure the cards that I receive from loved ones, so I think this is probably the most frugal gift you can give while still telling someone how much you care. In my house I have a garland of valentines that I found all at an antique store and if they weren't decor I would probably gift them because they are so freaking cute. I love the vintage look of them and think they would make a special gift, especially if you're lucky enough to find ones with messages from the 1930's like I was! 

3. Pick out books for each other. This one doubles as a date. I wish I could take credit for this idea but my boyfriend is the one who took me to do this on our first anniversary. We had 30 min to pick out a book for each other and explain why we chose it and then we bought them and gave them to each other. We agreed to not get any other gifts for each other besides the books which I loved. This is a great way to give more meaning to a gift for one another. 

4. Self care items. If your loved one has a busy job, is really active, or just doesn't do a good job taking care of themselves, it's always a good idea to get items that encourage them to relax. Epsom salts are great for active and tired muscles, sheet masks are great for skincare junkies, and bath bombs are great for those who don't always want to spend the money on bath products.

5. Good smelling things. Candles are always appreciated and if someone is into essential oils, picking out a favorite or new oil is always a great gift that doesn't have to be crazy expensive.

6. An indoor plant. I love some fresh greens in my house especially during the cold winter months, so Valentine's day is a great holiday to get someone a new plant instead of flowers that will inevitably die. I love succulents for people born without green thumbs (i.e. me). I love my aloe plant because it's grown huge and is really low maintenance. 

7. Print off favorite Instagram photos. In a world of Instagram and Social Media, we rarely print out pictures anymore! Find a few of your favorites together and print them off and find a creative way to display them. I can't tell you how appreciative I'd be to receive these because I never think to print out the pictures I love anymore!

8. Find a photo or memento that is meaningful and frame it. If you know that your loved one has a memento, old family member's photo, etc. that they really treasure, secretly steal it and frame it (Obviously make sure you don't do anything to harm the item in case they want to remove it later on...). I think this would be a great way to surprise someone you love.

9. Expensive healthy snacks. Since everyone and their grandma will give candy for Valentine's Day, mix it up and get someone those really expensive snacks that are good for you. Things like kombucha,  dried mangos, etc. that are great treats, but just too dang expensive to eat all the time. Like go to Whole Foods and get the organic healthier gummy bears... Not only will they be thankful to have the snacks that we wish we could always fill up our carts with every week, but they won't feel guilty about enjoying them because they are the healthier alternative. 

10. Subscriptions. There are a million and a half subscriptions you can get someone these days, but I think one like the Book of the Month club for example, would be a great gift. Some of them aren't that expensive, and the value is usually higher than what you pay for them. Buy a month or whatever your budget is, and introduce your loved one to something new! 

This Valentine's Day I encourage you to go for meaning before price tag. Your valentine will appreciate it that much more, and if they don't, they don't deserve to be your Valentine! If you don't have a valentine, do one of these things for yourself! Self love is more important than any of this. 

I hope you feel loved,

Andrea

Bold & Daring Valentine's Day Makeup Tutorial Video

Facetune_05-02-2018-17-34-30.jpg

I'm back with a makeup tutorial! Over on my Instagram (link is to the right-->) I created a poll in my stories asking if you wanted to see a romantic & soft makeup look or a bold & daring one. Technically, romantic & soft won by one vote, but I decided I would create both looks since it was so close! 

In the YouTube video below, I show you how to take a few shadows and create the easiest smokey eye. Products used are listed in the description of the video on YouTube, so be sure to click on the video and visit it there if you want details!

Remember, you can swap out any shadow for the cranberry/burgundy tones so this look is really versatile! Look for the romantic & soft tutorial to come early next week! 

Have a beautiful night,

Andrea 

Holiday Beauty Gift Guide

Happy December! I asked in an Instagram story poll if you'd rather see a holiday gift guide or current favorite beauty products post first, and here is what you chose! I had so many things to share, so I thought I'd mix things up and try a different format by filming a video for you guys! I didn't realize how many times I could say um until I had to edit them out! haha!

Below I've listed all of the products with links. If you like this format let me know and I'd be happy to start doing more of these for you. If you have any gift recommendations that you want to share with everyone be sure to leave a comment below. Have fun shopping for your loved ones!

How to Decorate for Christmas on a Budget

Today we're talking about Christmas and home decor. I've never really mentioned much about my home on the blog but many of you wanted to see how I will be decorating for Christmas this year, when I recently asked in an Instagram poll. My overall style with home decor is pretty simple; cozy. I want people to feel hugged by my house when they walk through the front door. I like neutral colors, but I like different textures and fabrics. I love antiques, vintage furniture, and items with a story. To me, I like my home to evoke a feeling of happiness mixed with memories. Nothing has to match, but everything has to flow. Christmas decorations are no exception. This is the first year I've really decorated for Christmas in my home so I wanted to share with you some ways that I've decorated that are budget friendly and still go along with my design asthetic. 

IMG_0320.JPG

Let's first talk about my tree because it honestly wasn't preplanned, it just kind of happened. I searched christmas trees on Amazon and this 5 ft white tree came up for $35. I have always loved the idea of a white tree and decided 5 ft was the perfect size for my little apartment, so I quickly bought it and the inspiration went from there. It's no secret that I love metallics and neutrals in everyday life, so after going to Target to browse ornaments, I found myself gravitating towards metallics, browns, and really rustic and natural colors. I didn't have many of my own ornaments so I purchased about $40 worth at Target and that is mostly what is on this tree. While most of my ornaments are within this color scheme, I purchased some red, green, and even pink ones, because I love the look of a mismatched, not perfectly coordinated tree. I even found a $4 gold sequined star that slips easily onto the top of your tree. Sugar Paper Designs did a collaboration with Target this year and the result is awesome! I highly recommend visiting Target to scope out the items if you need some stylish, yet inexpensive ornaments or decorations.

The other place I visited for ornaments was Cracker Barrel. The day I went all ornaments were buy 4 get one free. I grabbed some gold jingle bells, silver glass balls, and a cute white and brown glittery owl. My tree wasn't pre-lit, but I was able to cover the tree well with 200 white lights found at Target for $10. Overall I think this tree cost me about $100 to purchase and decorate and I love it. The white tree brightens the room up and still feels so cozy. 

IMG_0321.JPG

I placed my tree next to my entertainment area/book shelves which I then wanted to transform a little for the holidays as well. In my home I don't have a fireplace so I decided to hang my stockings on either shelf to frame the TV. I also picked up a $3 garland from the Target dollar spot, and wove it around the shelving and above the TV to connect the two shelves. I feel like this makes my entertainment center (which is really a TV stand sandwiched between two ladder bookshelves) look like one cohesive piece. I just so happen to have this star lamp from IKEA year round on this shelf, but I think it adds to the Christmas feeling. 

IMG_0323.JPG
IMG_0322.JPG

Next up we have my coffee table. This table runner was gifted to me last year and I love how it adds a little bit of color to my table. In order to stay organized with remotes and such, I like to have a little tray or something centered. I found this wooden board again in the Target dollar spot and decided it would be perfect. They even had a $3 coffee mug in the dollar spot that I decided would be perfect for holding remotes, pens, and all the little things that end up on this coffee table. I love the look of using items in an unexpected way and this coffee mug is no exception.  

IMG_0325.JPG

This next DIY is one of my favorites. As mentioned before, I love antiques and could spend hours going from booth to booth at antique markets. I love to find new uses for older items. One of my favorite things to find is old postcards. If you've been to my house, you may have seen my valentine garland in my hallway, which is a collection of old valentines sent in the 1910's-30's that have the cutest little sayings and love poems. Recently, I took this idea and made it more christmas inspired. I purchased holiday postcards at an antique shop and decided to clothespin them to this garland in my living room. There's something about the vintage artwork that is very comforting. 

IMG_0324.JPG

The last item I want to discuss is Pomander balls. Yesterday I got together with some of my close friends to start a tradition. Every year we want to get together to make some sort of holiday decoration and this year we started off with Pomander balls. I used to make these as a child and was so excited to share these with friends. Not only are they so beautiful and customizable, but they smell amazing and can be treasured for a long time. I learned how to make them from Martha Stewart, so here is a link to her directions.  We used a nail to poke the oranges before inserting the cloves and it worked great. We sprinkled ours in arrowroot powder and cinnamon to preserve them and make them smell even better. It's amazing how just one of these in a room can really make it smell like Christmas. If you google citrus pomander balls, you'll see loads of inspiration on how to design and create your own. 

IMG_0308[318].JPG

There you have it. So far this is how I have decorated for Christmas. So far everyone has told me I've nailed the cozy factor right on the head, so I'm happy it's coming along. Let me know what you think and please share your Christmas traditions with me! I love to hear about what unique things people do for holidays. 

Now I'm off to go make homemade bagels. Have a relaxing and wonderful Sunday friends!

-Andrea